Overview
The Plugin Store in Mayar serves as an integration hub that enables users to easily add extensions and third-party services to their system. Through the Plugin Store, users can customize Mayar’s functionality to suit their business requirements — such as adding payment integrations, notification systems, analytics tools, or task automation features. With its flexible and user-friendly design, the Plugin Store helps businesses enhance their platform capabilities without complex technical development, making operations more efficient and better integrated.Using Plugins
Here’s a guide on how to use the available plugins.Mailketing Send Plugin
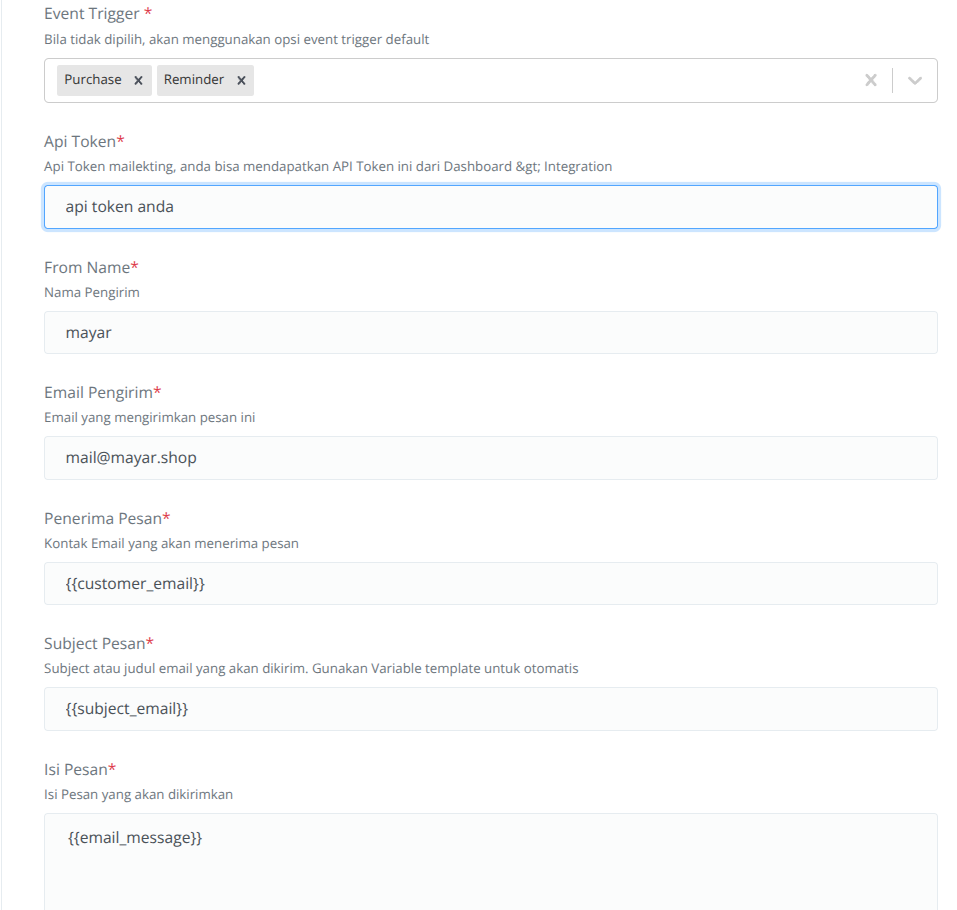
Mailketing Send Email is a plugin that allows you to send emails to buyers or potential customers. To use this plugin, you must first have an account at mailketing.co.id. Once you have an account, click the + button to activate the plugin. After activation, fill out the configuration form with accurate data. Event Trigger This trigger determines when the email will be sent using Mailketing. You can choose:- Purchase – the email is sent when a purchase is made.
- Reminder – the email is sent if the customer hasn’t completed the payment within 5 minutes.
Sender Email
The email address used to send messages. This sender email must be registered in your Mailketing dashboard.
Recipient Email
The email address of the message recipient. You can use variables that adapt to your customer’s data.
Email Subject
The subject or title of the email to be sent. You can use variables that match the product details purchased by the customer.
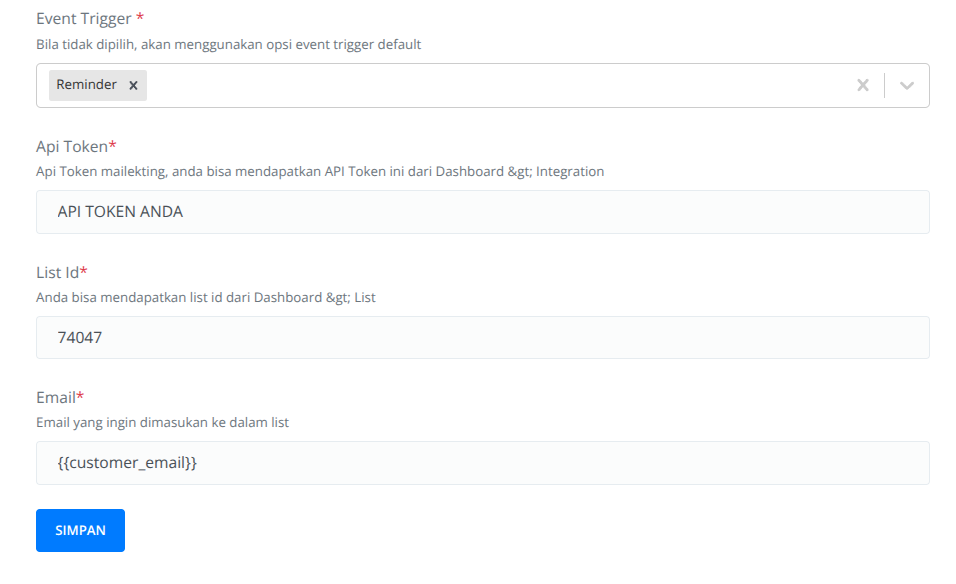
Mailketing List Plugin
The Mailketing List plugin lets you create and add contacts to an email list in your Mailketing account. To use this plugin, click the + button to activate it. Then, go to the Settings tab and fill out the required fields. Event Trigger Choose when to send contact data using Mailketing. Available options:- Purchase – triggered when a purchase is made.
- Reminder – triggered if the customer hasn’t made a payment within 5 minutes.
List ID
The ID of the email list where you want to add the contact. You can find this ID in your Mailketing dashboard.
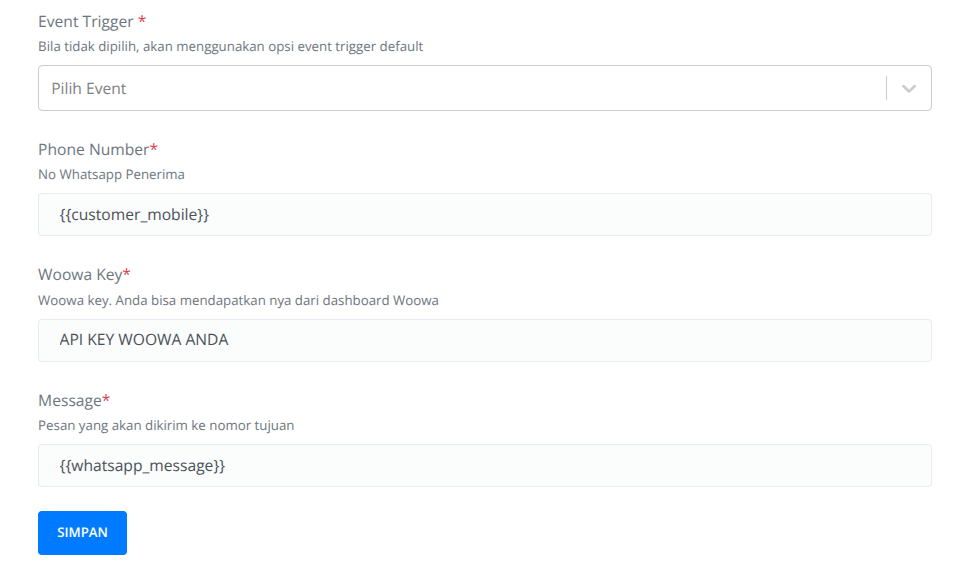
Woowa Plugin
The Woowa Plugin allows you to send WhatsApp messages to your customers based on the trigger you choose. Before using this plugin, you must have a Woowa account. For a smoother integration process, you should use our referral link provided in the plugin summary section. To use the plugin, click the + button to activate it, then open the Settings tab and fill out the form. Event Trigger Choose when the WhatsApp message should be sent. Available options:- Purchase – when a purchase is made.
- Reminder – when the customer hasn’t completed payment within 5 minutes.
Phone Number
The WhatsApp number where the message will be sent. You can use variables that match your customer’s data.
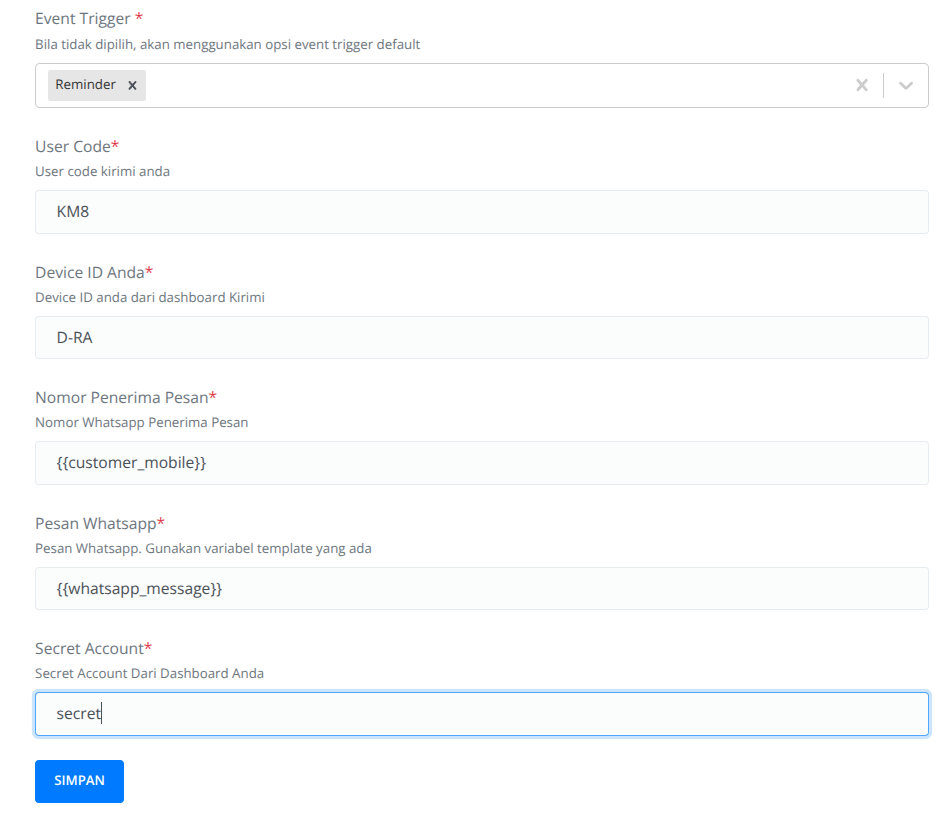
Kirimi Plugin
The Kirimi Plugin allows you to send WhatsApp messages directly to your customers. To use it, click the + button to activate the plugin, then go to the Settings tab and fill in the required details. Event Trigger Choose when the message should be sent. Available options:- Purchase – when a purchase is made.
- Reminder – when the customer hasn’t completed payment within 5 minutes.
Recipient Number
The WhatsApp number where the message will be sent. You can use variables that match your customer’s data.