Overview
The Custom Form feature on Mayar allows sellers to customize the Payment Form for their products or services at checkout. With this feature, sellers can easily create a comprehensive template based on their specific requirements. Custom Forms can also be configured for certain product types, making it easier to manage and control which options to add.How to Create a Custom Form?
Follow these simple steps to create a Custom Form in Mayar:

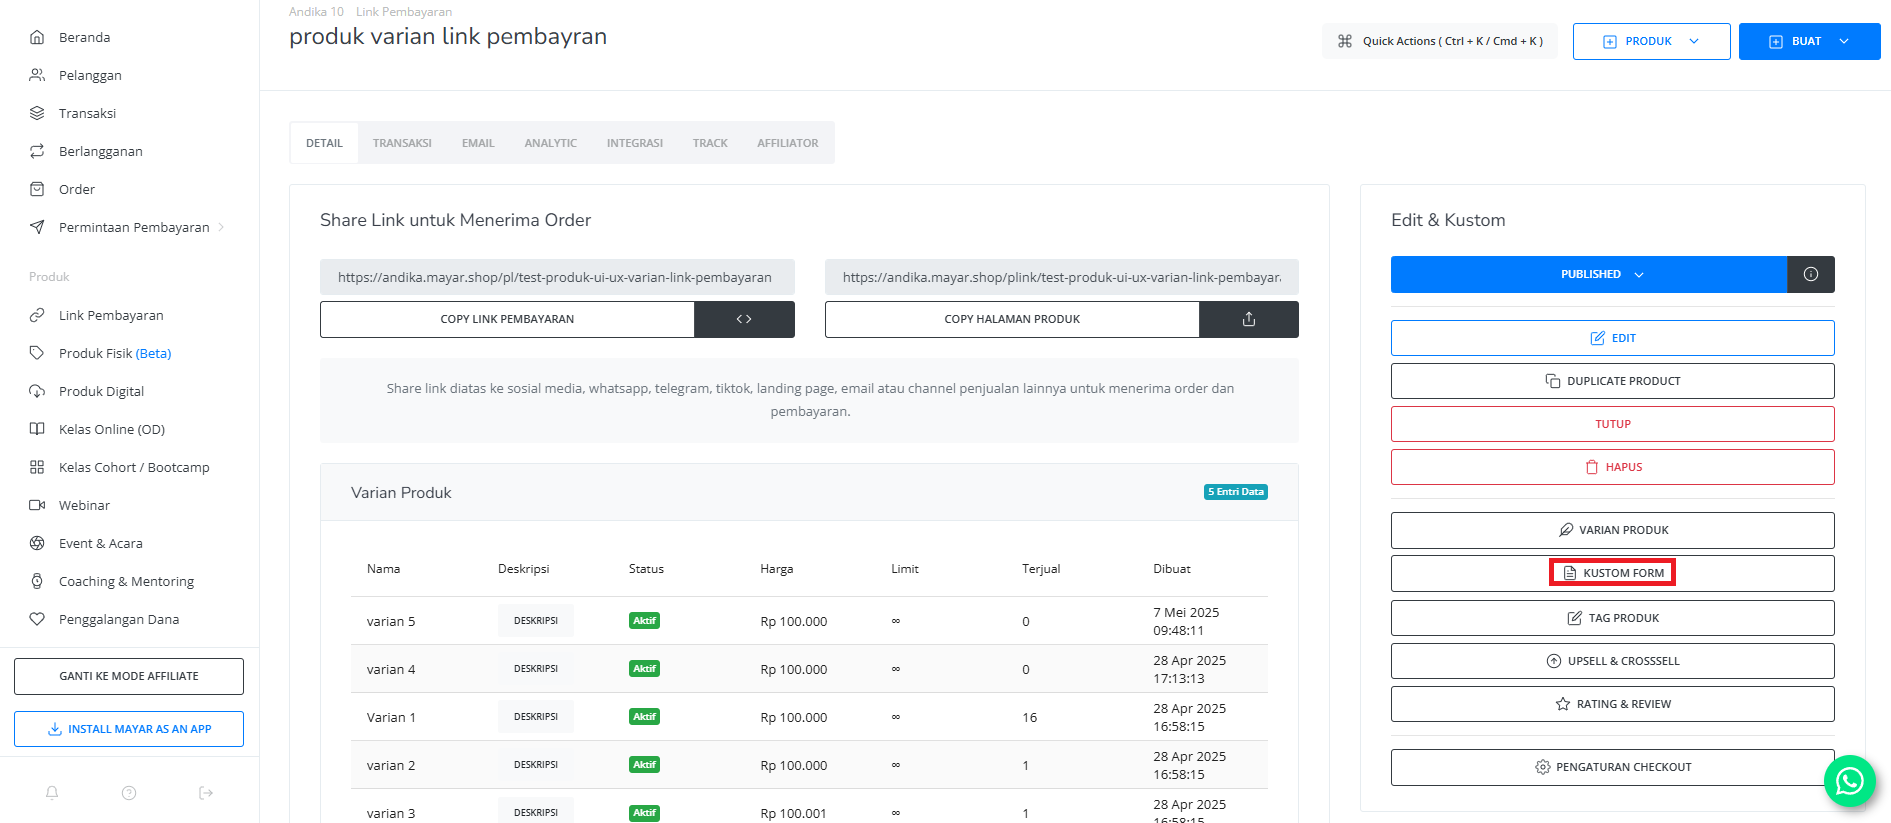
Fill in Custom Form Page
The Custom Form page will appear. Fill in the required details and create your custom input.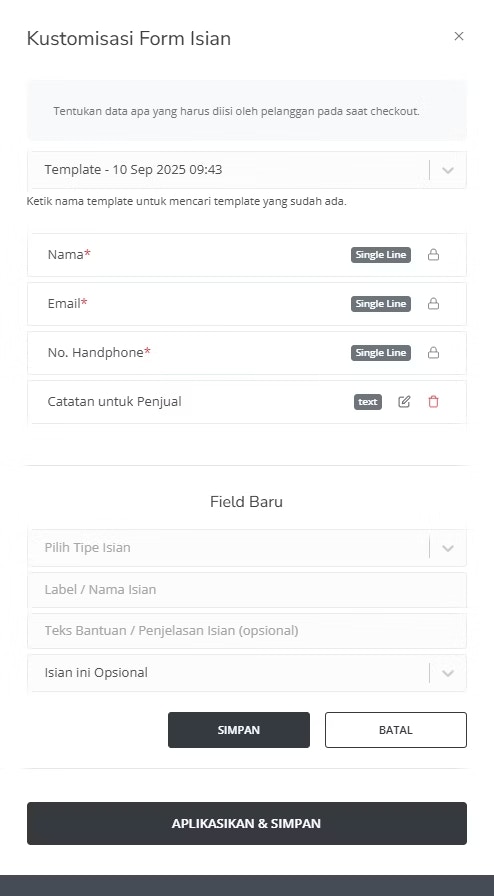
| Input Form | Description |
|---|---|
| Add Fields | Create a new input field. |
| Dropdown Field Fill Types | Various types of Data : - Single Line Text (limit 99 characters) - Multi-Line Text (limit 250 characters) - Checkbox - Numbers - Date Picker - Dropdown - URL / Tautan |
| Name Tag | Define the label name of the field. |
| Help Text (optional) | Add an additional description for the field. |
| Required or Optional | Choose whether this field is mandatory or optional. |
| Save Button | Save your Custom Form template. |
Save the Form
Once you’ve completed the form, click the Save button. You’ll be redirected back to the product page. Congratulations — your Custom Form has been successfully created!