Overview
The Mayar Physical Product platform offers a comprehensive overview of managing physical products, enabling businesses to accept payments for various items with ease and efficiency. Through the intuitive Mayar Web Apps, users can create and manage physical product listings tailored to their specific inventory needs. This extensive documentation provides step-by-step instructions on how to create and customize payment links via the Mayar Dashboard, ensuring a smooth and secure transaction process for both sellers and customers. By leveraging these tools, businesses can enhance their sales operations and improve customer satisfaction.Navigate to Physical Product
Log in to your Mayar Dashboard
Make sure you are logged into your account and on the main Dashboard Page. This is where you will start with the Physical Product.
Create Physical Product
Access the Product Menu
Click the “Product” button at the top right near the “Create” button. This will take you to the product menu.
Choose Product Type
Select the “Physical Product” option to start creating your Writing product. The “Create Physical Product” window will open.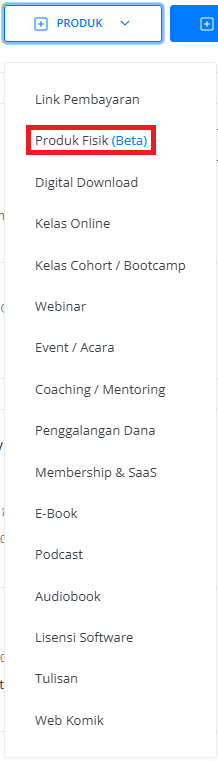
Fill in Product Details
Enter the following information:
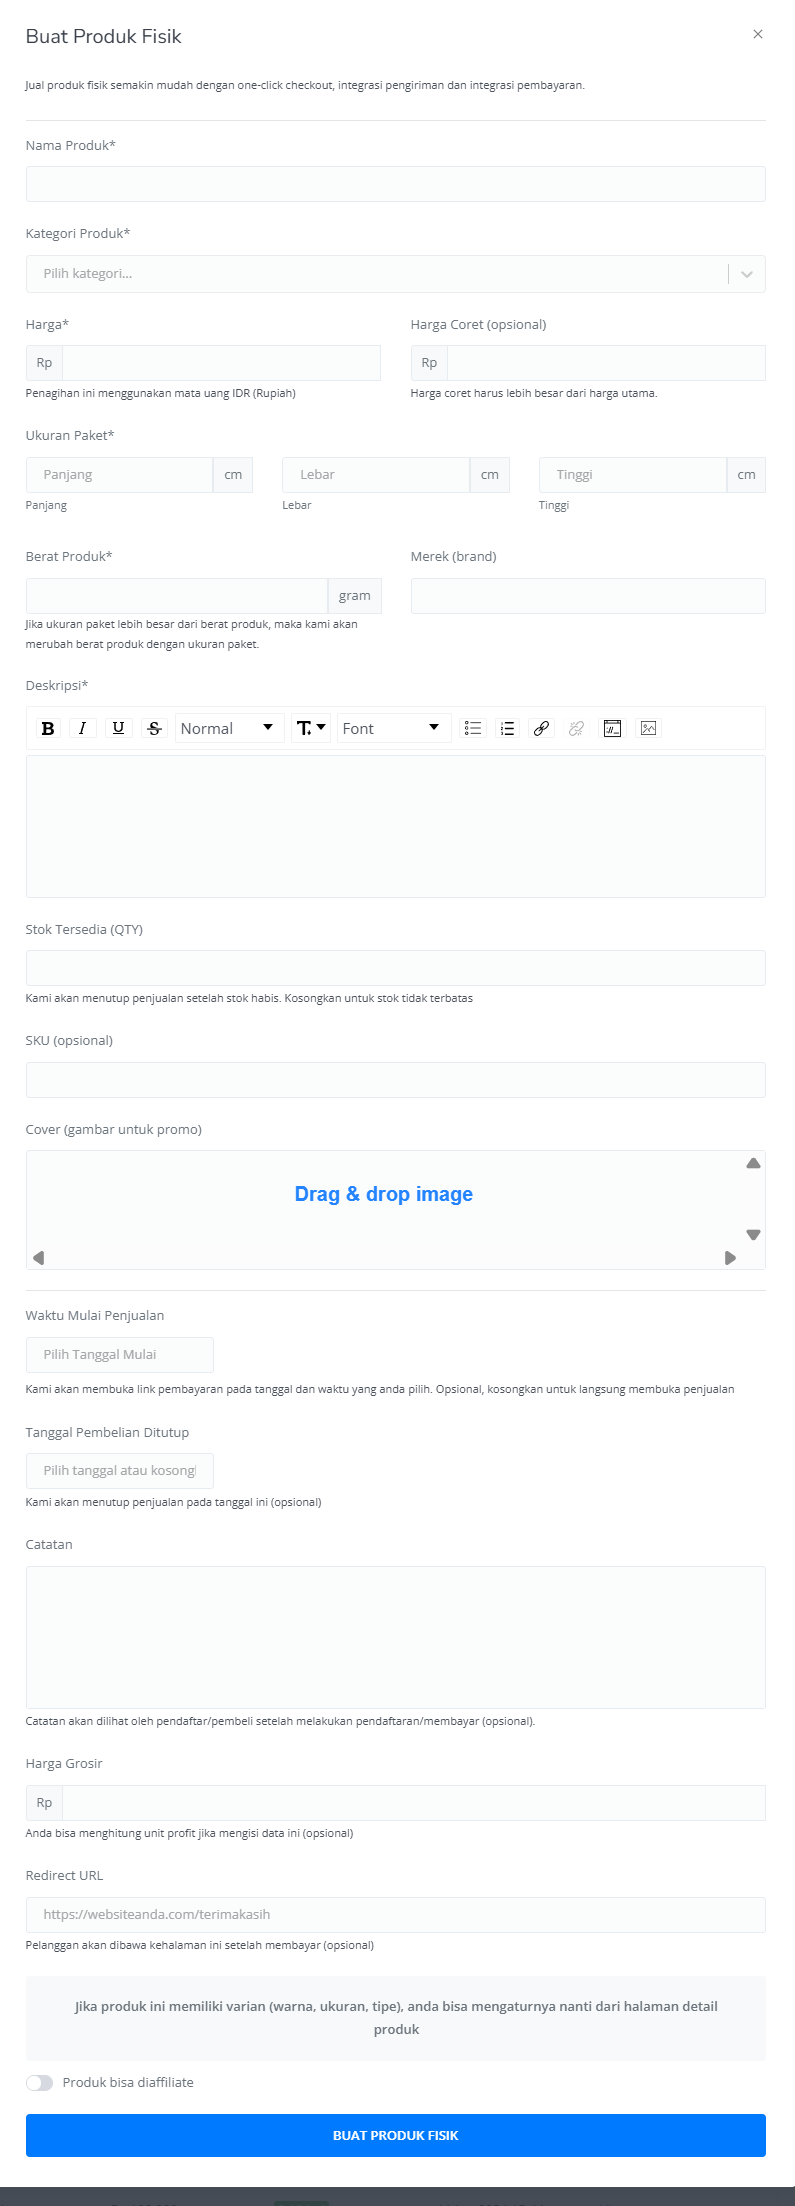
| Input Form | Description |
|---|---|
| Name Product | Name of Physical Product. |
| Category | Category of Physical Product class. |
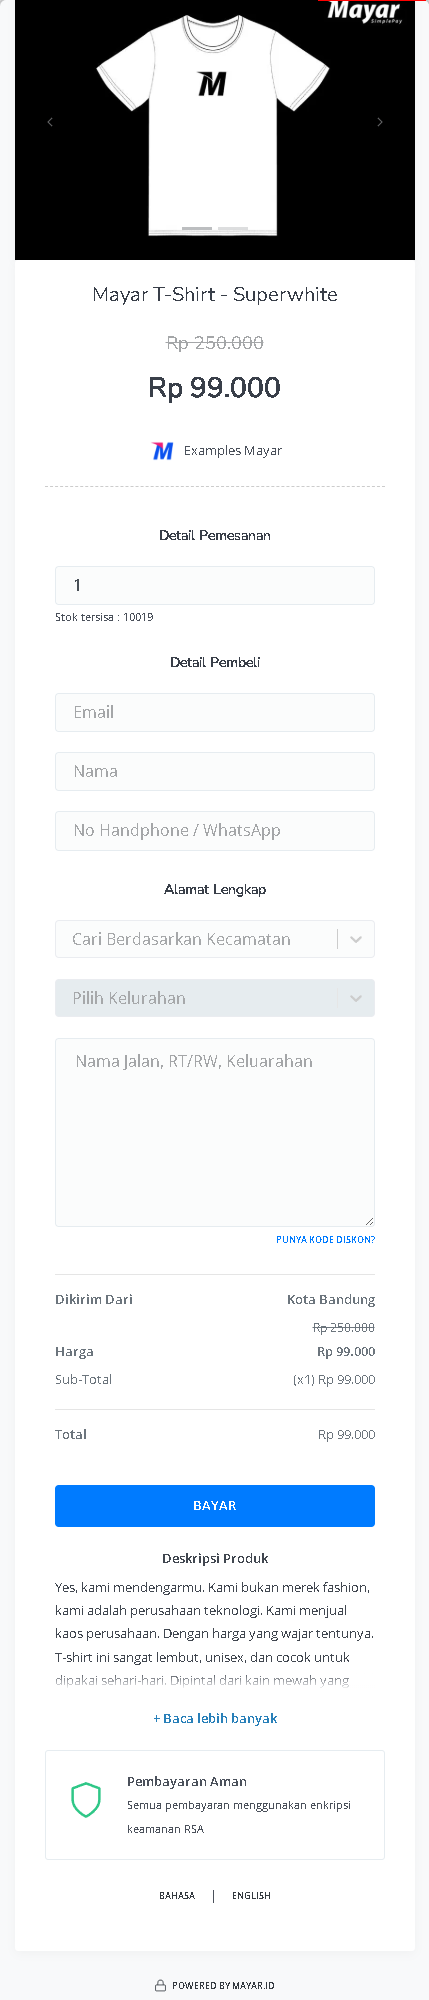
| Price | Price of Physical Product. |
| Strikethrough price | Price of Physical Product before Discount (Optional). |
| Package Size | Set up your Package Size of Physical Product (Length, Width, Height). |
| Product Weight | Set your Product Weight estimation. |
| Brand | Brand of your Physical Product. |
| Description | Description field for Physical Product. |
| Stock | Stock of Physical Product that is ready to sell. |
| Terms & Condition | Terms & Conditions of Physical Product (Optional). |
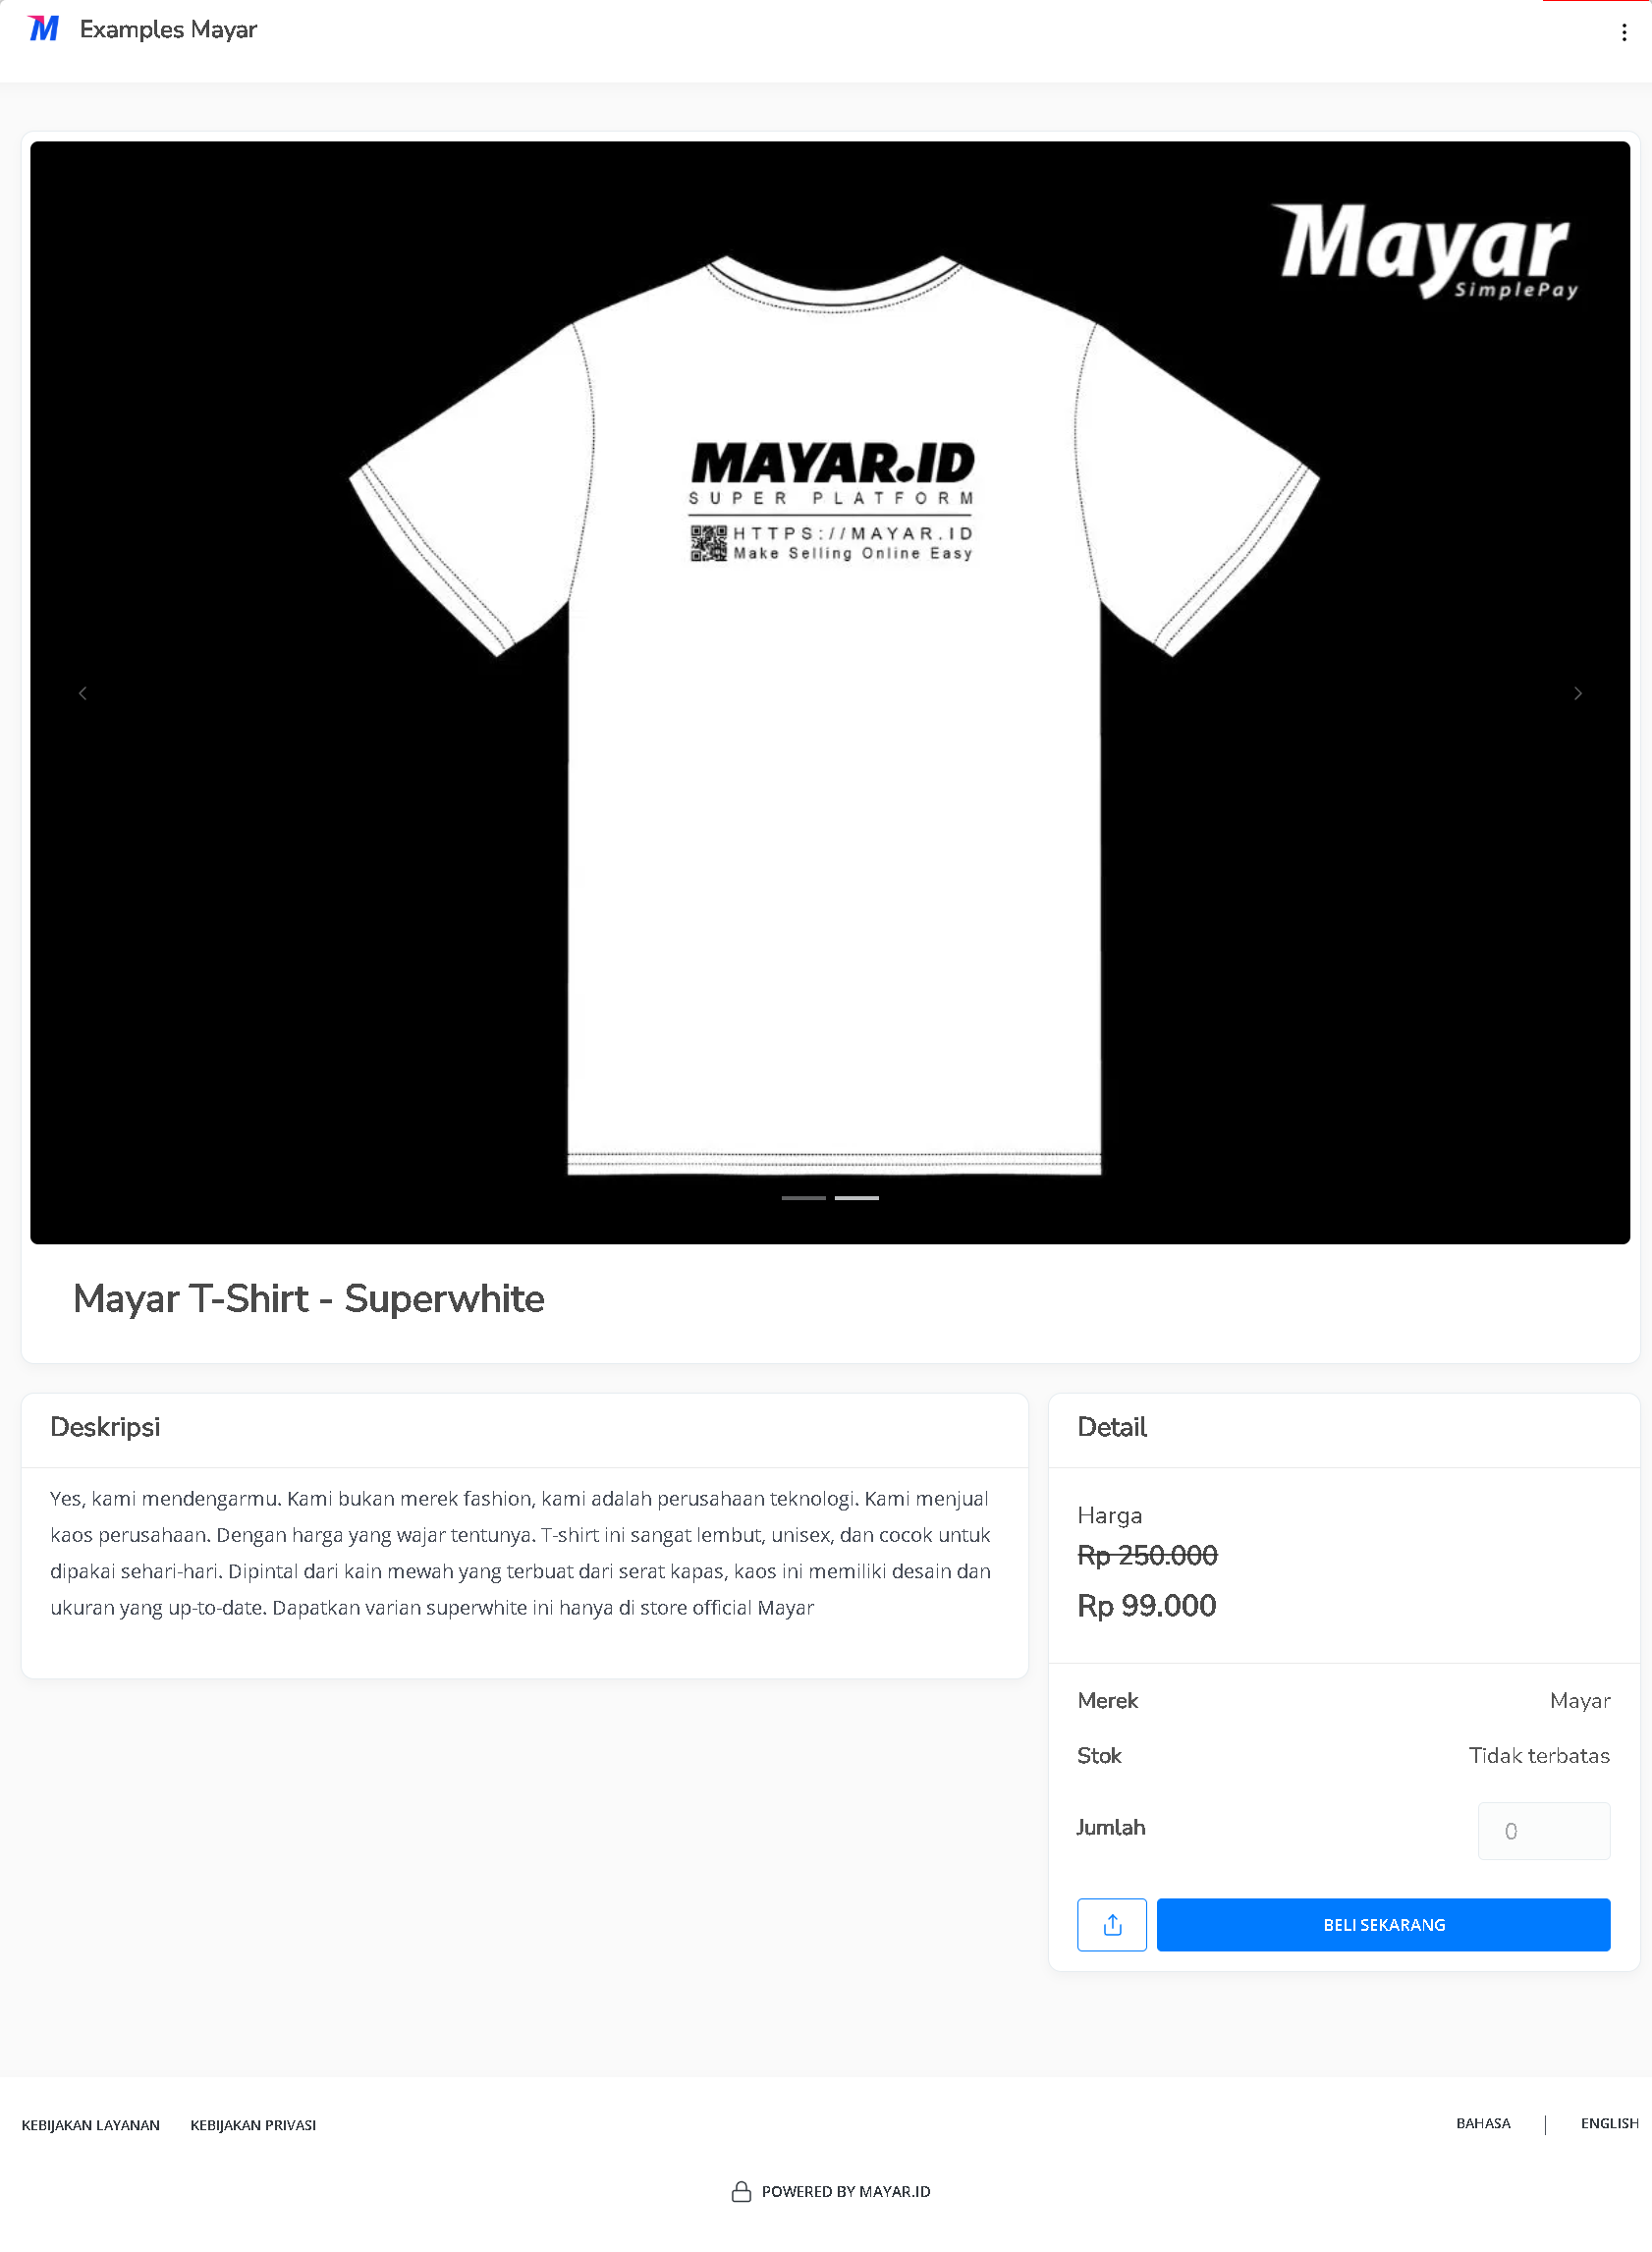
| Cover (Image for promotion) | Cover image of Physical Product for promotion. |
| Sales Start Time | Start time for the open Link Payment page. |
| Expired Date | Start time for the close Link Payment page (Optional). |
| Notes | Notes of Physical Product: the customer can see it after payment (Optional) |
| Wholesale Prices | Set Wholesale Prices on your own (Optional). |
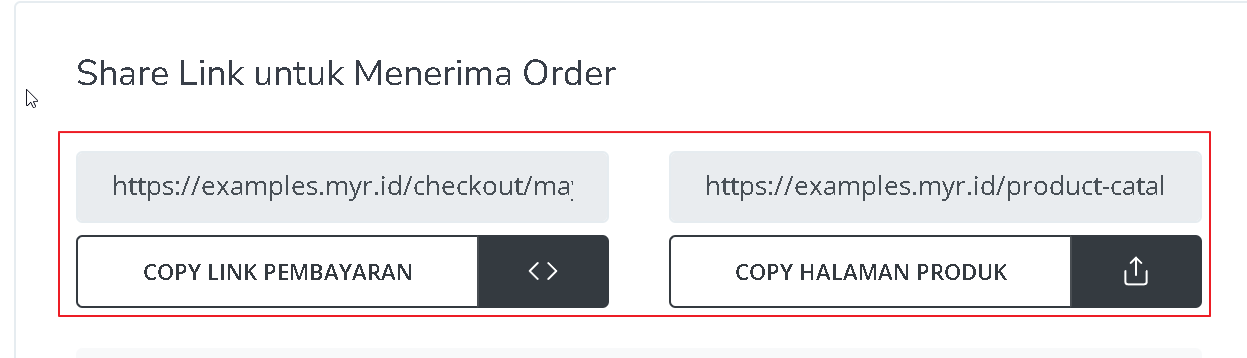
| Redirect URL | Directing the customer through the page (Optional), if empty, the customer will be directed to the Mayar checkout page |
| Button Create Physical Product Link Payment | Button to create Physical Product Link Payment |
Review and Finish
After filling in all the information, review the product details to ensure everything is correct. On the product detail page, you will see the following:
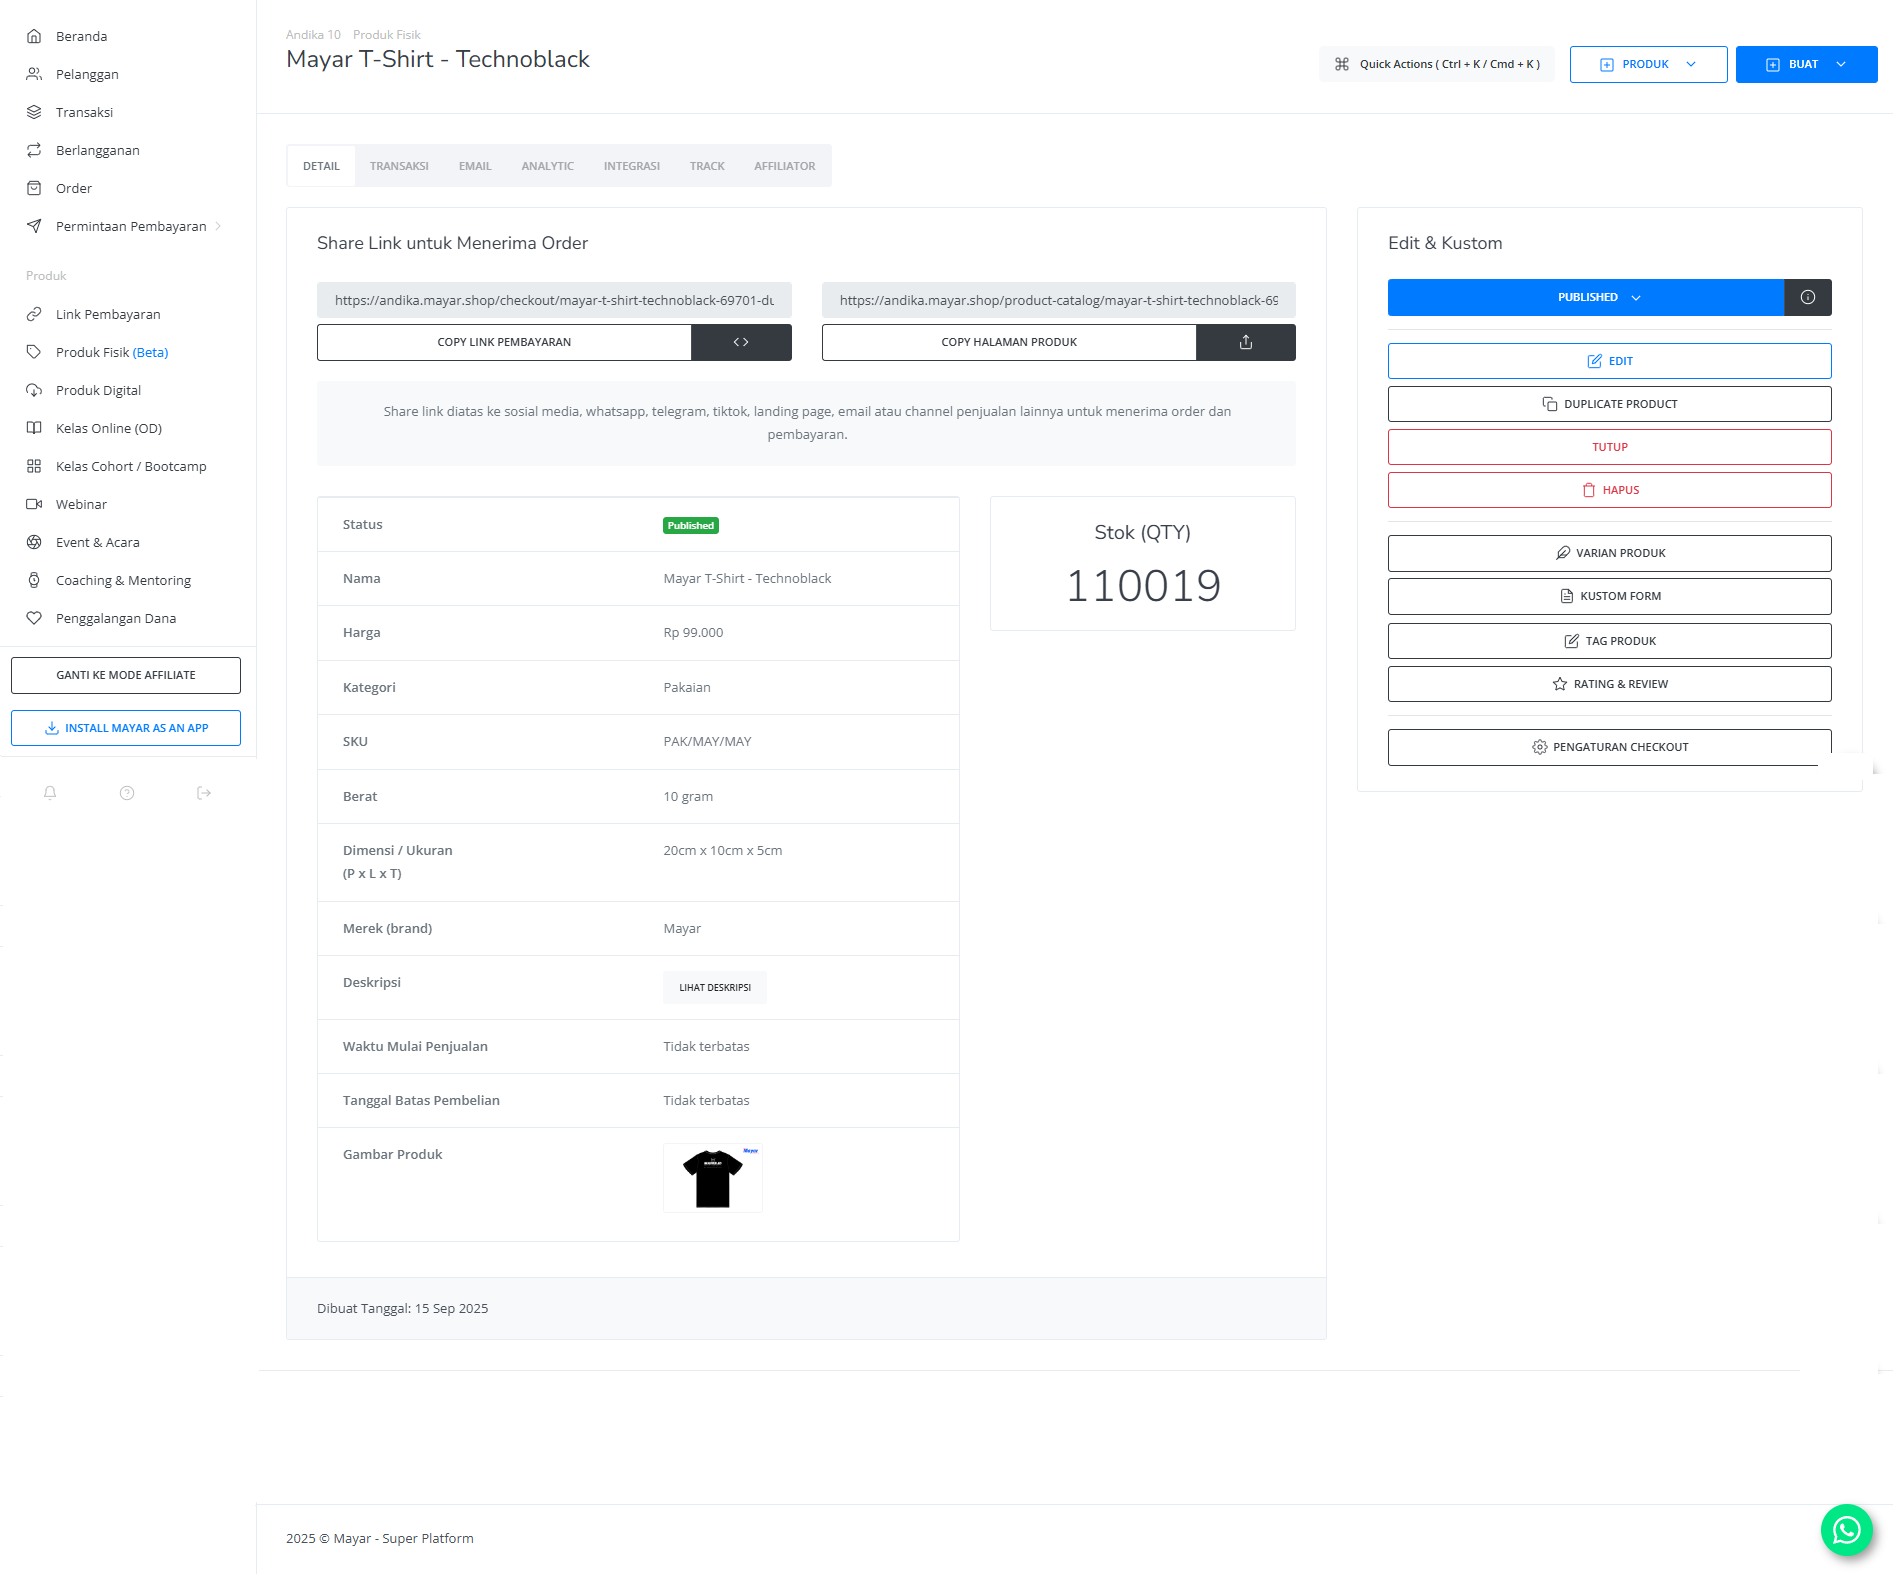
| Information | Description |
|---|---|
| Status | Status of Physical Product: checkout active or deactivated. |
| Name | Name of Physical Product. |
| Price | Price of Physical Product. |
| Category | Academic category fields of Physical Product. |
| Terms & Condition | Terms & Conditions of Physical Product. |
| Product Weight | Product Weight estimation. |
| Size Dimensions | Package Size of Physical Product (Length, Width, Height). |
| Brand | Brand of your Physical Product. |
| Description | Description field for Physical Product. |
| Sales Start Time | Start time for the open Link Payment page. |
| Expired Date | Start time for the close Link Payment page. |
| Image Product | Cover Image of Physical Product for promotion. |