Overview
Mayar Bootcamp is an innovative online course platform designed to facilitate the creation and management of structured classes and courses across a wide range of study programs. This platform is tailored to make educational content more accessible and organized, providing both educators and learners with a seamless experience. By leveraging the capabilities of Mayar Bootcamp, educators can design comprehensive curricula that cater to diverse learning needs and preferences. The bootcamp courses can be effortlessly created and managed using the user-friendly Mayar Web Apps. These applications offer intuitive tools for setting up classes, organizing course materials, and engaging with students. The platform supports a variety of educational formats, enabling instructors to deliver content most effectively. This documentation is specifically focused on guiding users through the process of creating and customizing payment links via the Mayar Dashboard. By utilizing these tools, educators can efficiently manage course enrollments, process payments, and track financial transactions. The Mayar Dashboard provides extensive customization options, allowing educators to tailor payment processes to align with their specific course offerings and institutional requirements. Through this comprehensive approach, Mayar Bootcamp empowers educators to enhance the learning experience while ensuring administrative processes remain smooth and efficient.Navigate to Bootcamp
Log in to your Mayar Dashboard
Make sure you are logged into your account and on the main Dashboard Page. This is where you will start with the Bootcamp.
Create Bootcamp
Access the Product Menu
Click the “Product” button at the top right near the “Create” button. This will take you to the product menu.
Choose Product Type
Select the “Bootcamp” option to start creating your Writing product. The “Create Bootcamp” window will open.
Fill in Product Details
Enter the following information:
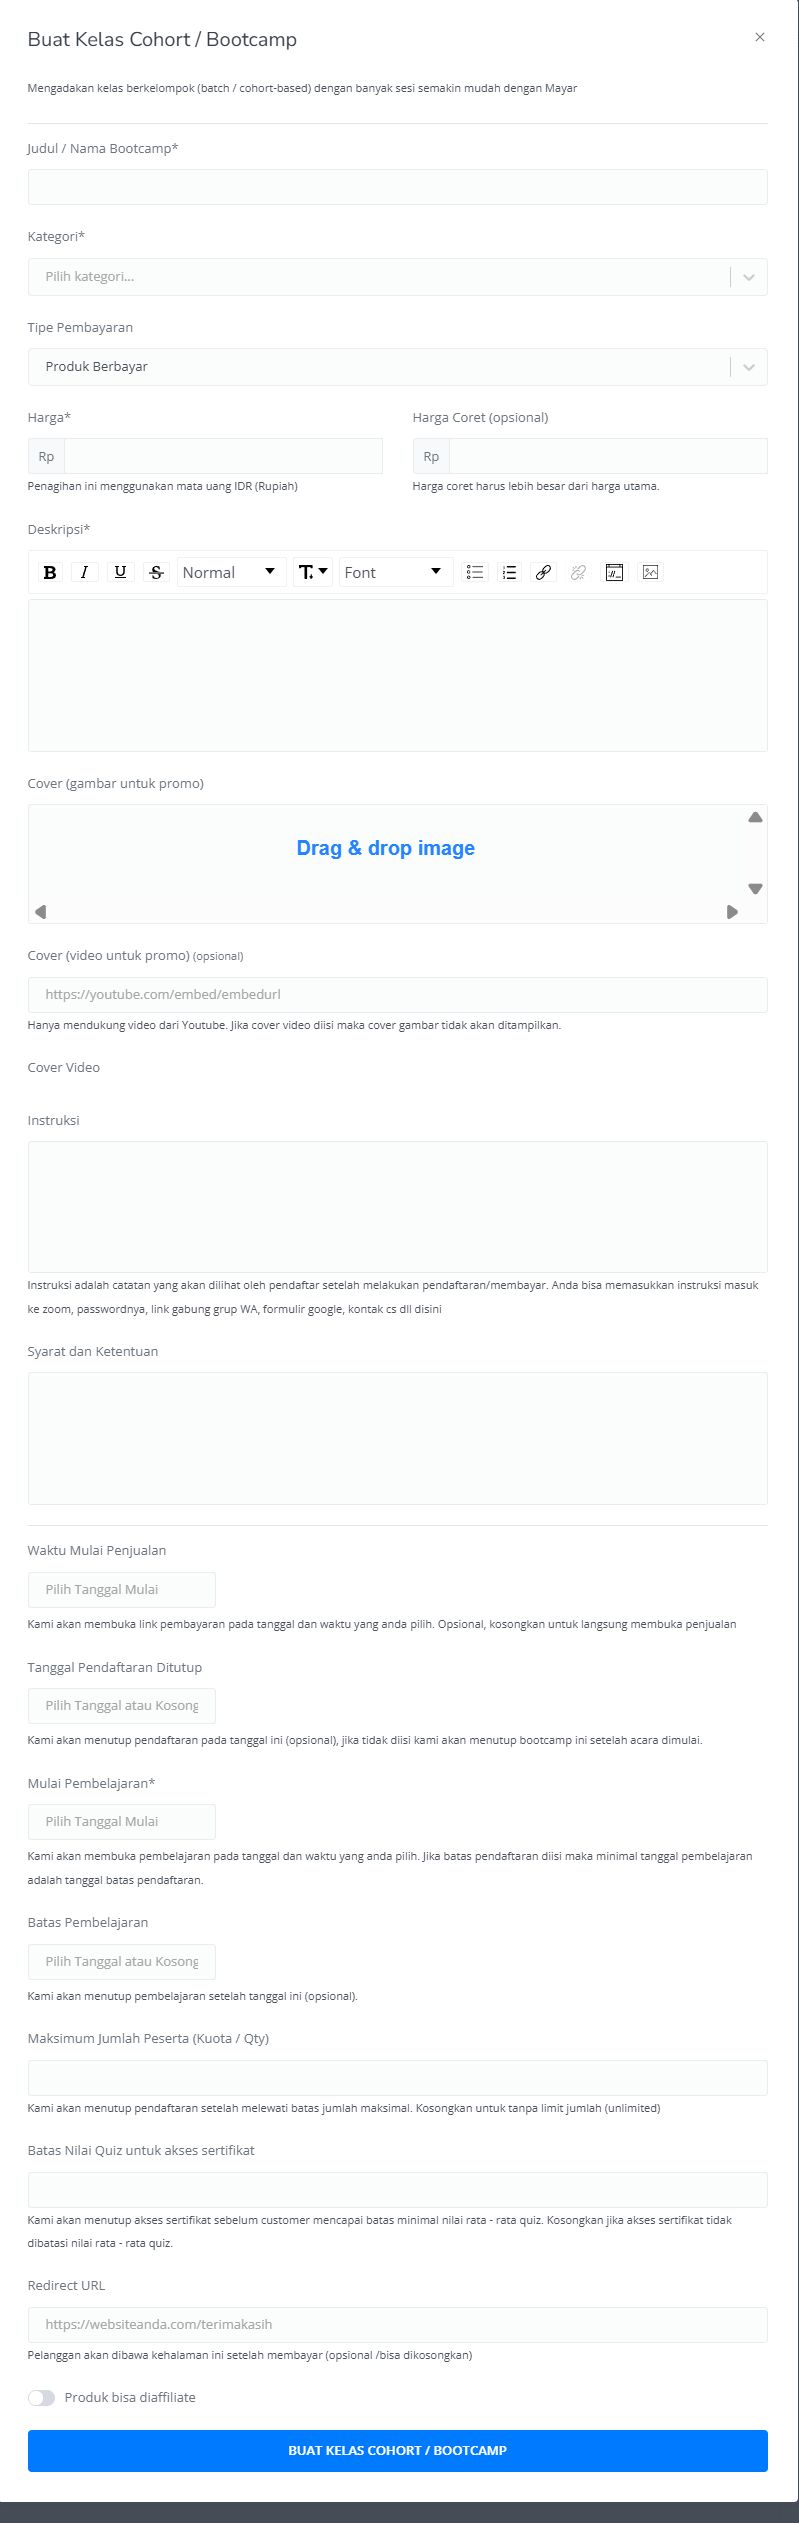
| Input Form | Description |
|---|---|
| Bootcamp Tittle | Title of Bootcamp. |
| Category | Category of Bootcamp class. |
| Payment Type | Set up your Payment type. |
| Price | Price of Bootcamp event. |
| Strikethrough price | Price of Bootcamp event before Discount (Optional). |
| Description | Description field for Bootcamp event. |
| Cover (Image for promotion) | Cover image of Bootcamp for promotion. |
| Cover (Video for promotion) | Cover image of Bootcamp for promotion (Optional) |
| Instruction | Guide for Bootcamp Event. |
| Terms & Condition | Terms & Conditions for Bootcamp event. |
| Sales Start Time | Start time for the open Link Payment page. |
| Expired Date | Start time for the close Link Payment page (Optional). |
| Start Time | Start time for Bootcamp Event. |
| End Time | End time for Bootcamp Event. |
| Maximum Bootcamp member amount (Quota/qty) | Set up the maximum quantity of Bootcamp members that can be sold (Optional). If empty, the quantity will be unlimited. |
| Quiz score limit for certificate access | Set up a quiz score to get certificate access for the member. |
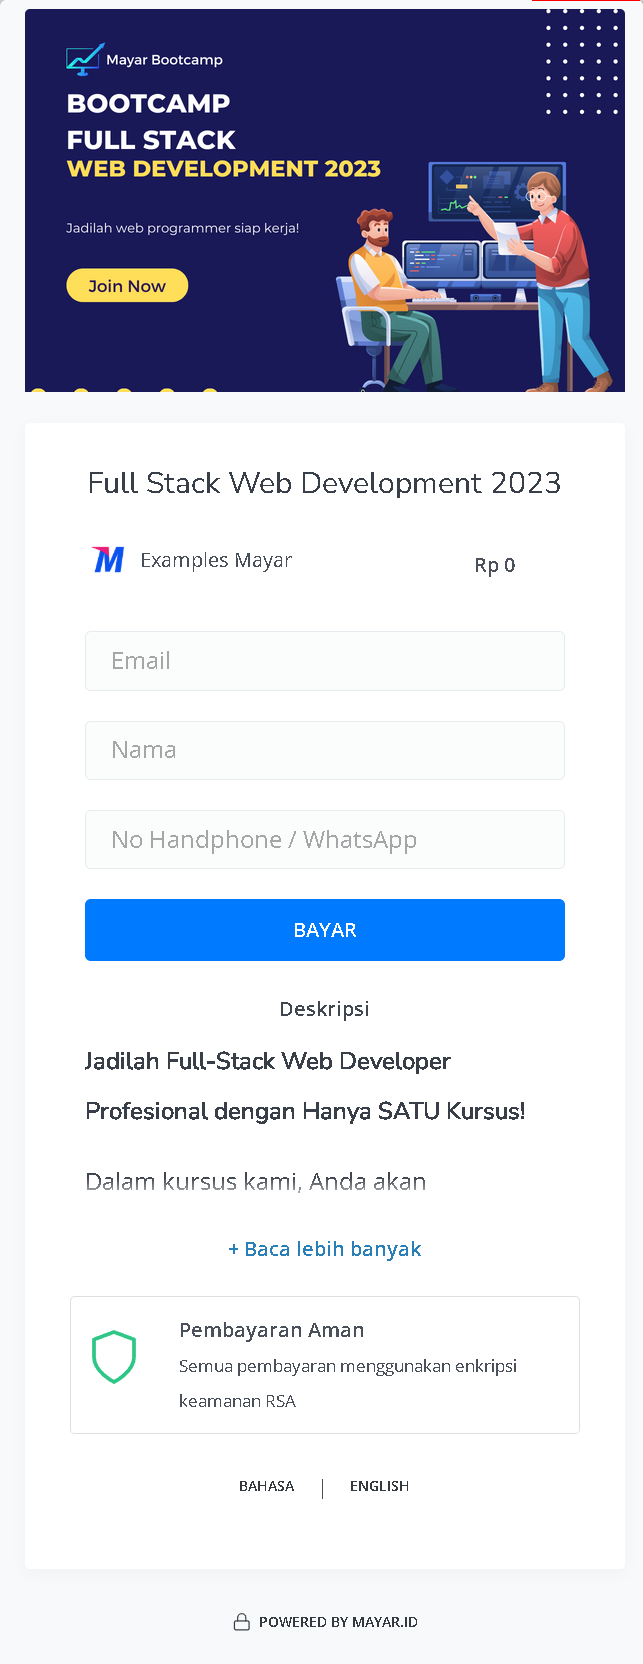
| Redirect URL | Directing the customer through the page (Optional), if empty, the customer will be directed to the Mayar checkout page |
| The product can be affiliated | Product can be affiliated by others (Optional) |
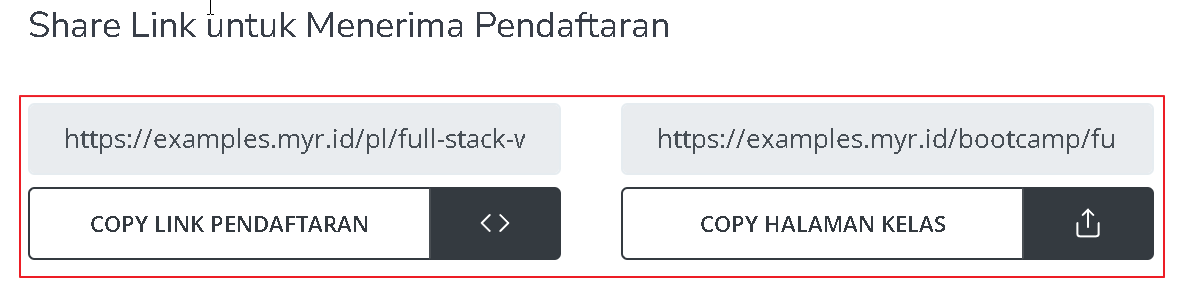
| Button Create Bootcamp Link Payment | Button to create Bootcamp Link Payment |
Review and Finish
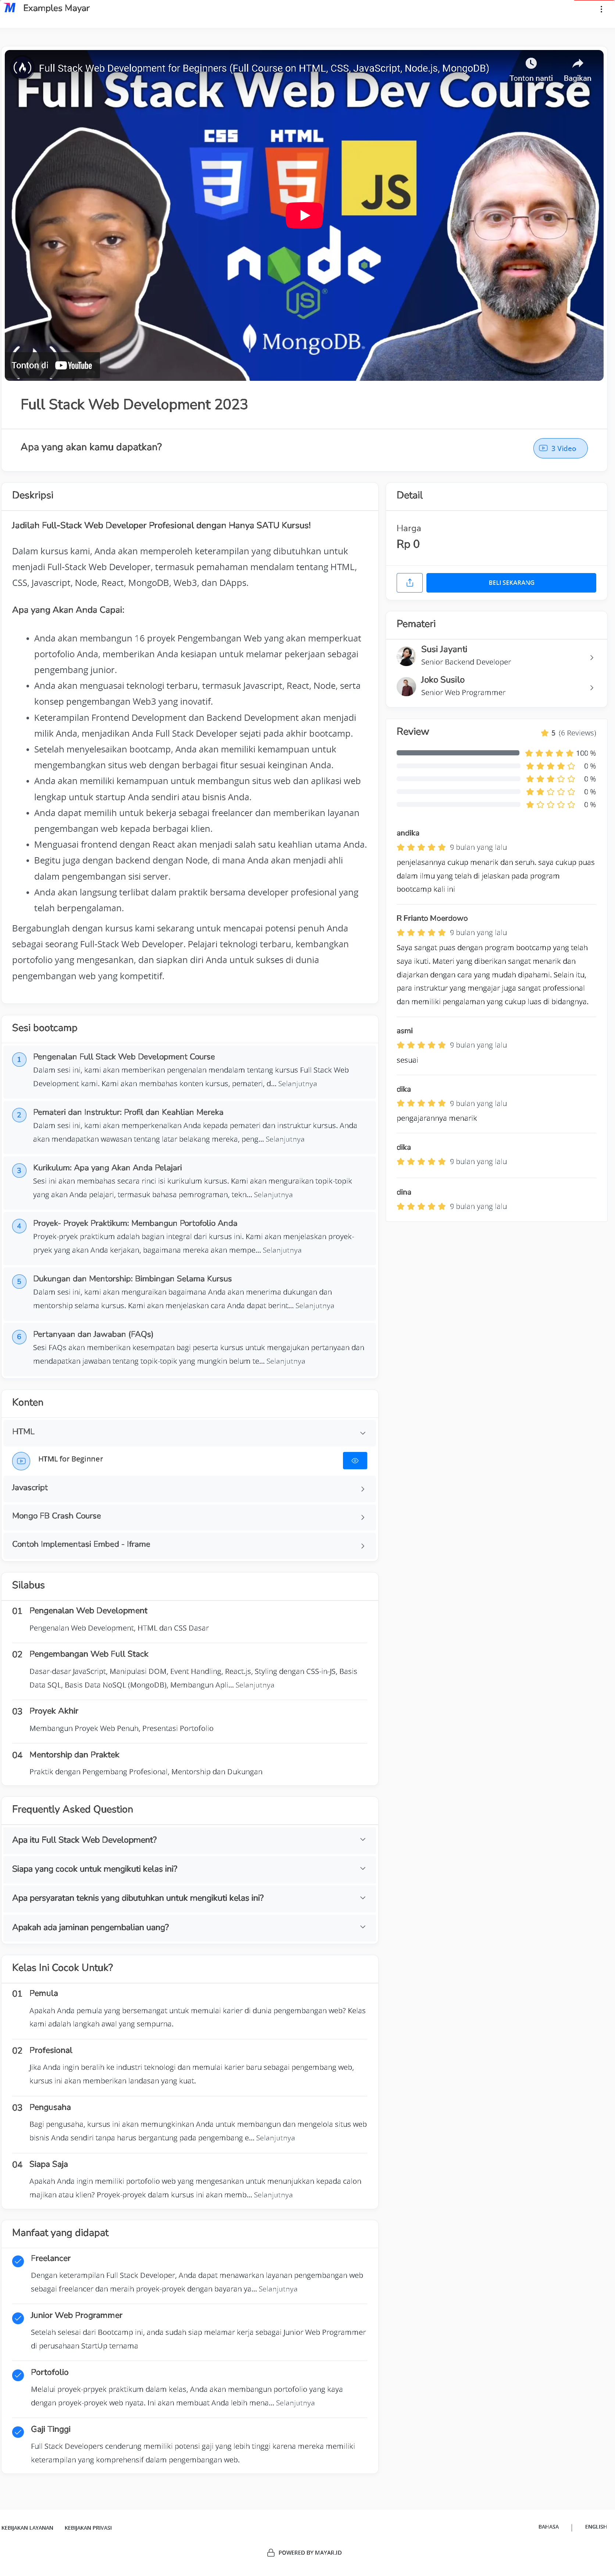
After filling in all the information, review the product details to ensure everything is correct. On the product detail page, you will see the following:
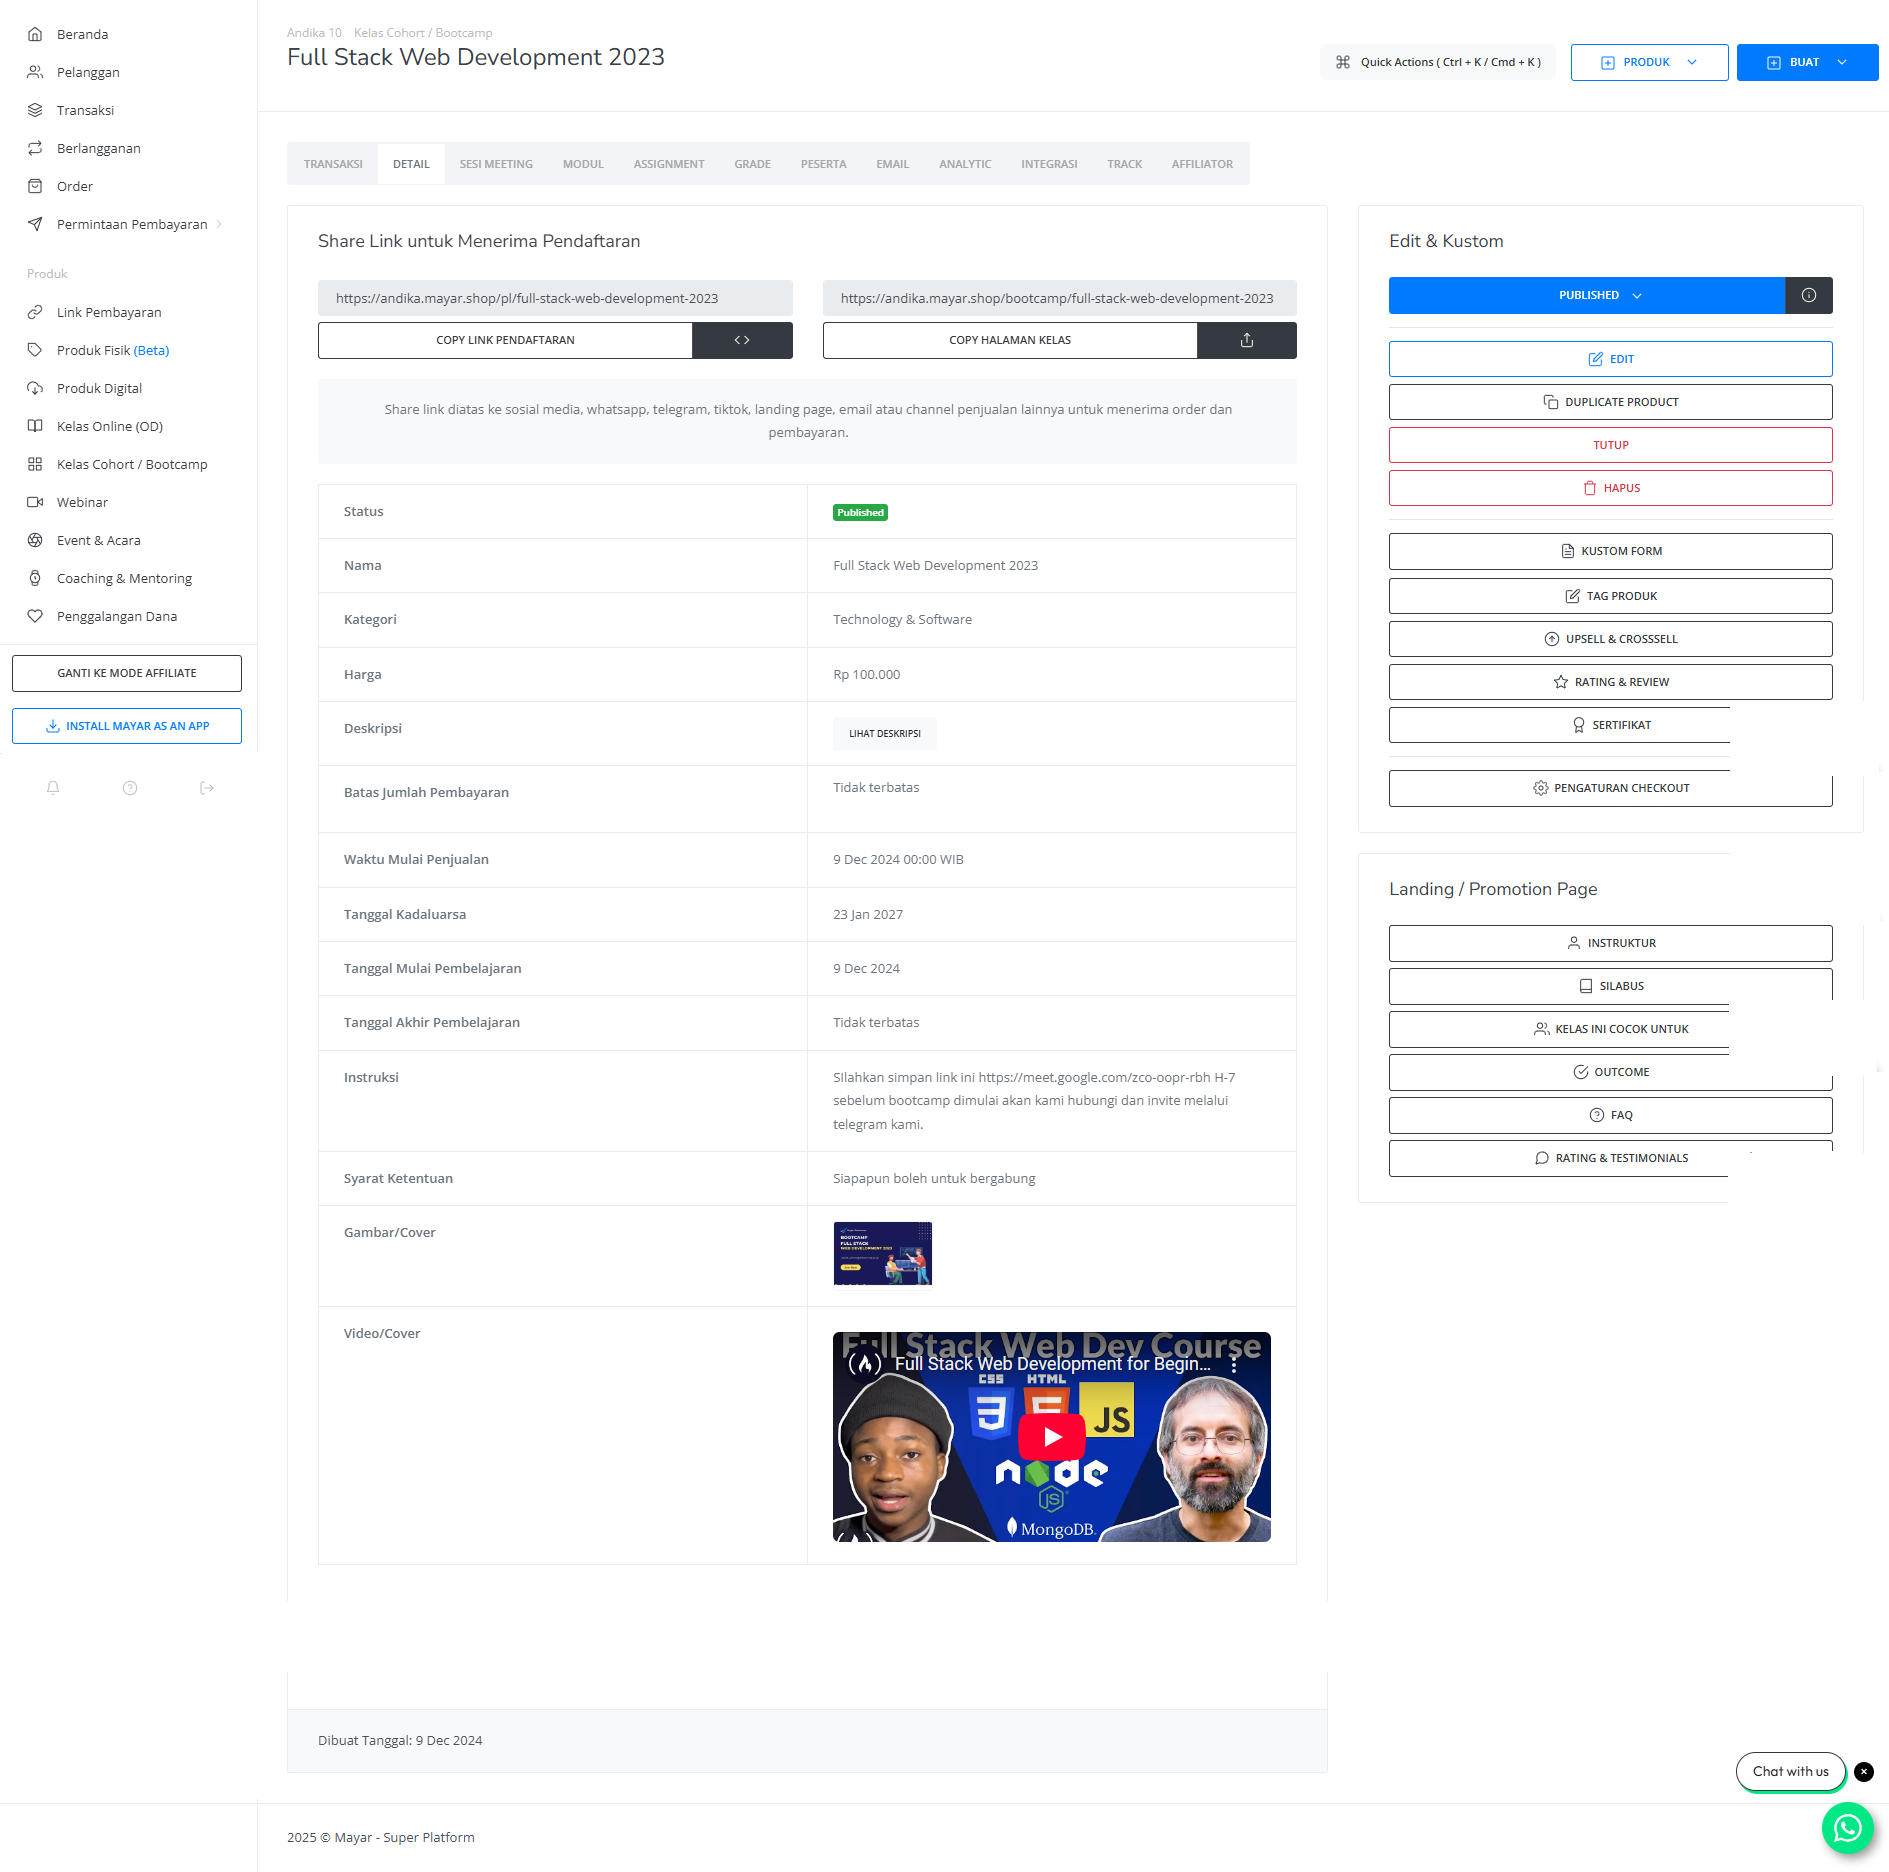
| Information | Description |
|---|---|
| Status | Status of Bootcamp (Published, Unpublished, and Unlisted). |
| Name | Name of bootcamp event. |
| Category | Academic category fields of Bootcamp. |
| Price | Price of Bootcamp. |
| Description | Description field for Bootcamp. |
| Payment Amount Limit | Maximum payment for Bootcamp. |
| Sales Start Time | Start time for the open Link Payment page. |
| Expired Date | Start time for the close Link Payment page. |
| Time Start of learning | Estimation Time Start for Bootcamp. |
| Time End of learning | Estimation Time End for Bootcamp. |
| Instructions | Guide through the Bootcamp. |
| Terms & Condition | Terms & Conditions for Bootcamp event. |
| Image Cover | Cover Image of Bootcamp for promotion. |
| Video Cover | Video Image of Bootcamp for promotion. |