Overview
SaaS (Software as a Service) is a software delivery model provided over the internet. It allows users to access applications from multiple devices without the need to download or install them locally. On the Mayar platform, SaaS offers high flexibility and scalability, enabling businesses to adjust their software usage based on their needs without requiring large upfront investments in IT infrastructure. Updates and maintenance are handled by the service provider, so users can focus on their core business activities without worrying about technical issues. Data security and easy access are key advantages of SaaS, making it a popular choice for businesses looking to improve operational efficiency and team collaboration.How to Create a SaaS Product
Click the “Product” Button
Find and click the “Product” button at the top right corner, next to the “Create” button.
Select “Membership & SaaS”
When the creation menu appears, select “Membership & SaaS” to get started. A new window titled “Create Membership” will open.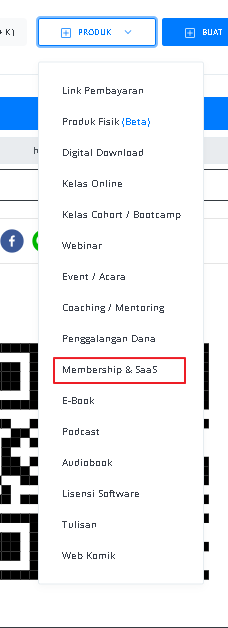
Fill in SaaS Product Details
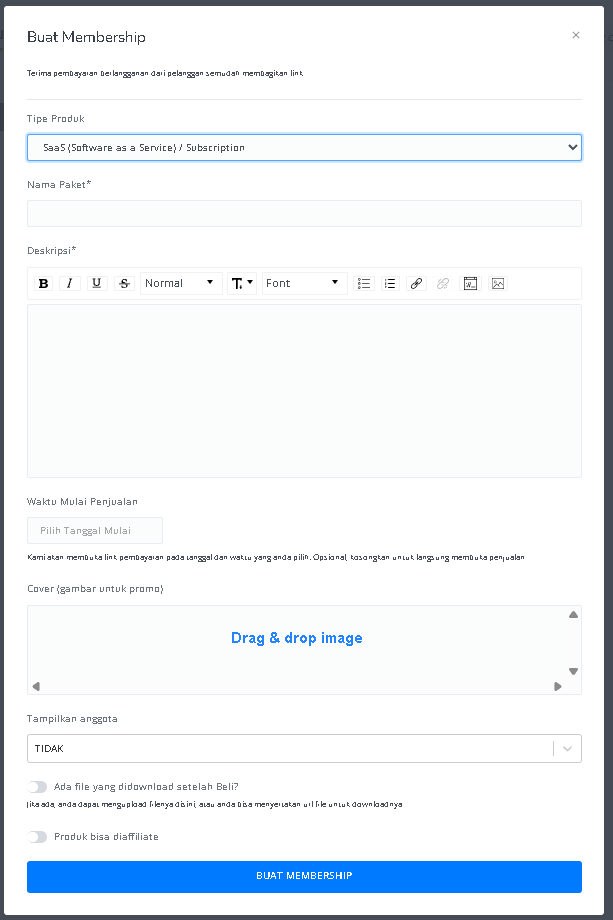
Enter the following information:
| Input Form | Description |
|---|---|
| Product Type | A dropdown that shows the product type, which is “SaaS (Software as a Service) / Subscription”. |
| Package Name | Field to enter the SaaS package name. |
| Description | Text area to add the package description with text editing tools (bold, italic, underline, etc.). |
| Sales Start Time | Field to select the sales start date and time. Optional, leave blank to start immediately. |
| Cover (promotional image) | Area to upload the promotional image for the package (drag & drop). |
| Show Members | Dropdown to choose whether or not to display members. |
| Downloadable File After Purchase? | Option to upload a file that can be downloaded after purchase or provide a file URL. |
| Product Can Be Affiliated | Option to allow the product to be part of the affiliate program. |
| ”CREATE MEMBERSHIP” Button | Button to submit the form and create the SaaS product. |
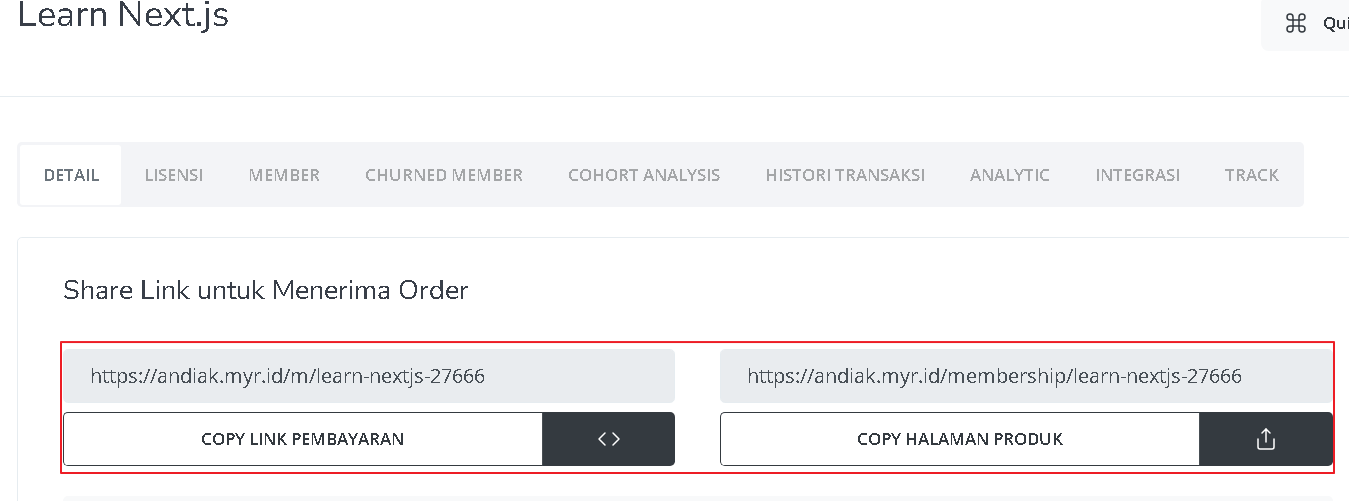
Access SaaS Product Detail Page
After entering the information and creating the SaaS product, you will be redirected to the SaaS Product Detail page. Here, you can see the following information:
| Information | Description |
|---|---|
| Status | Shows whether the product has been published or not. “Published” means the product is available to the public. |
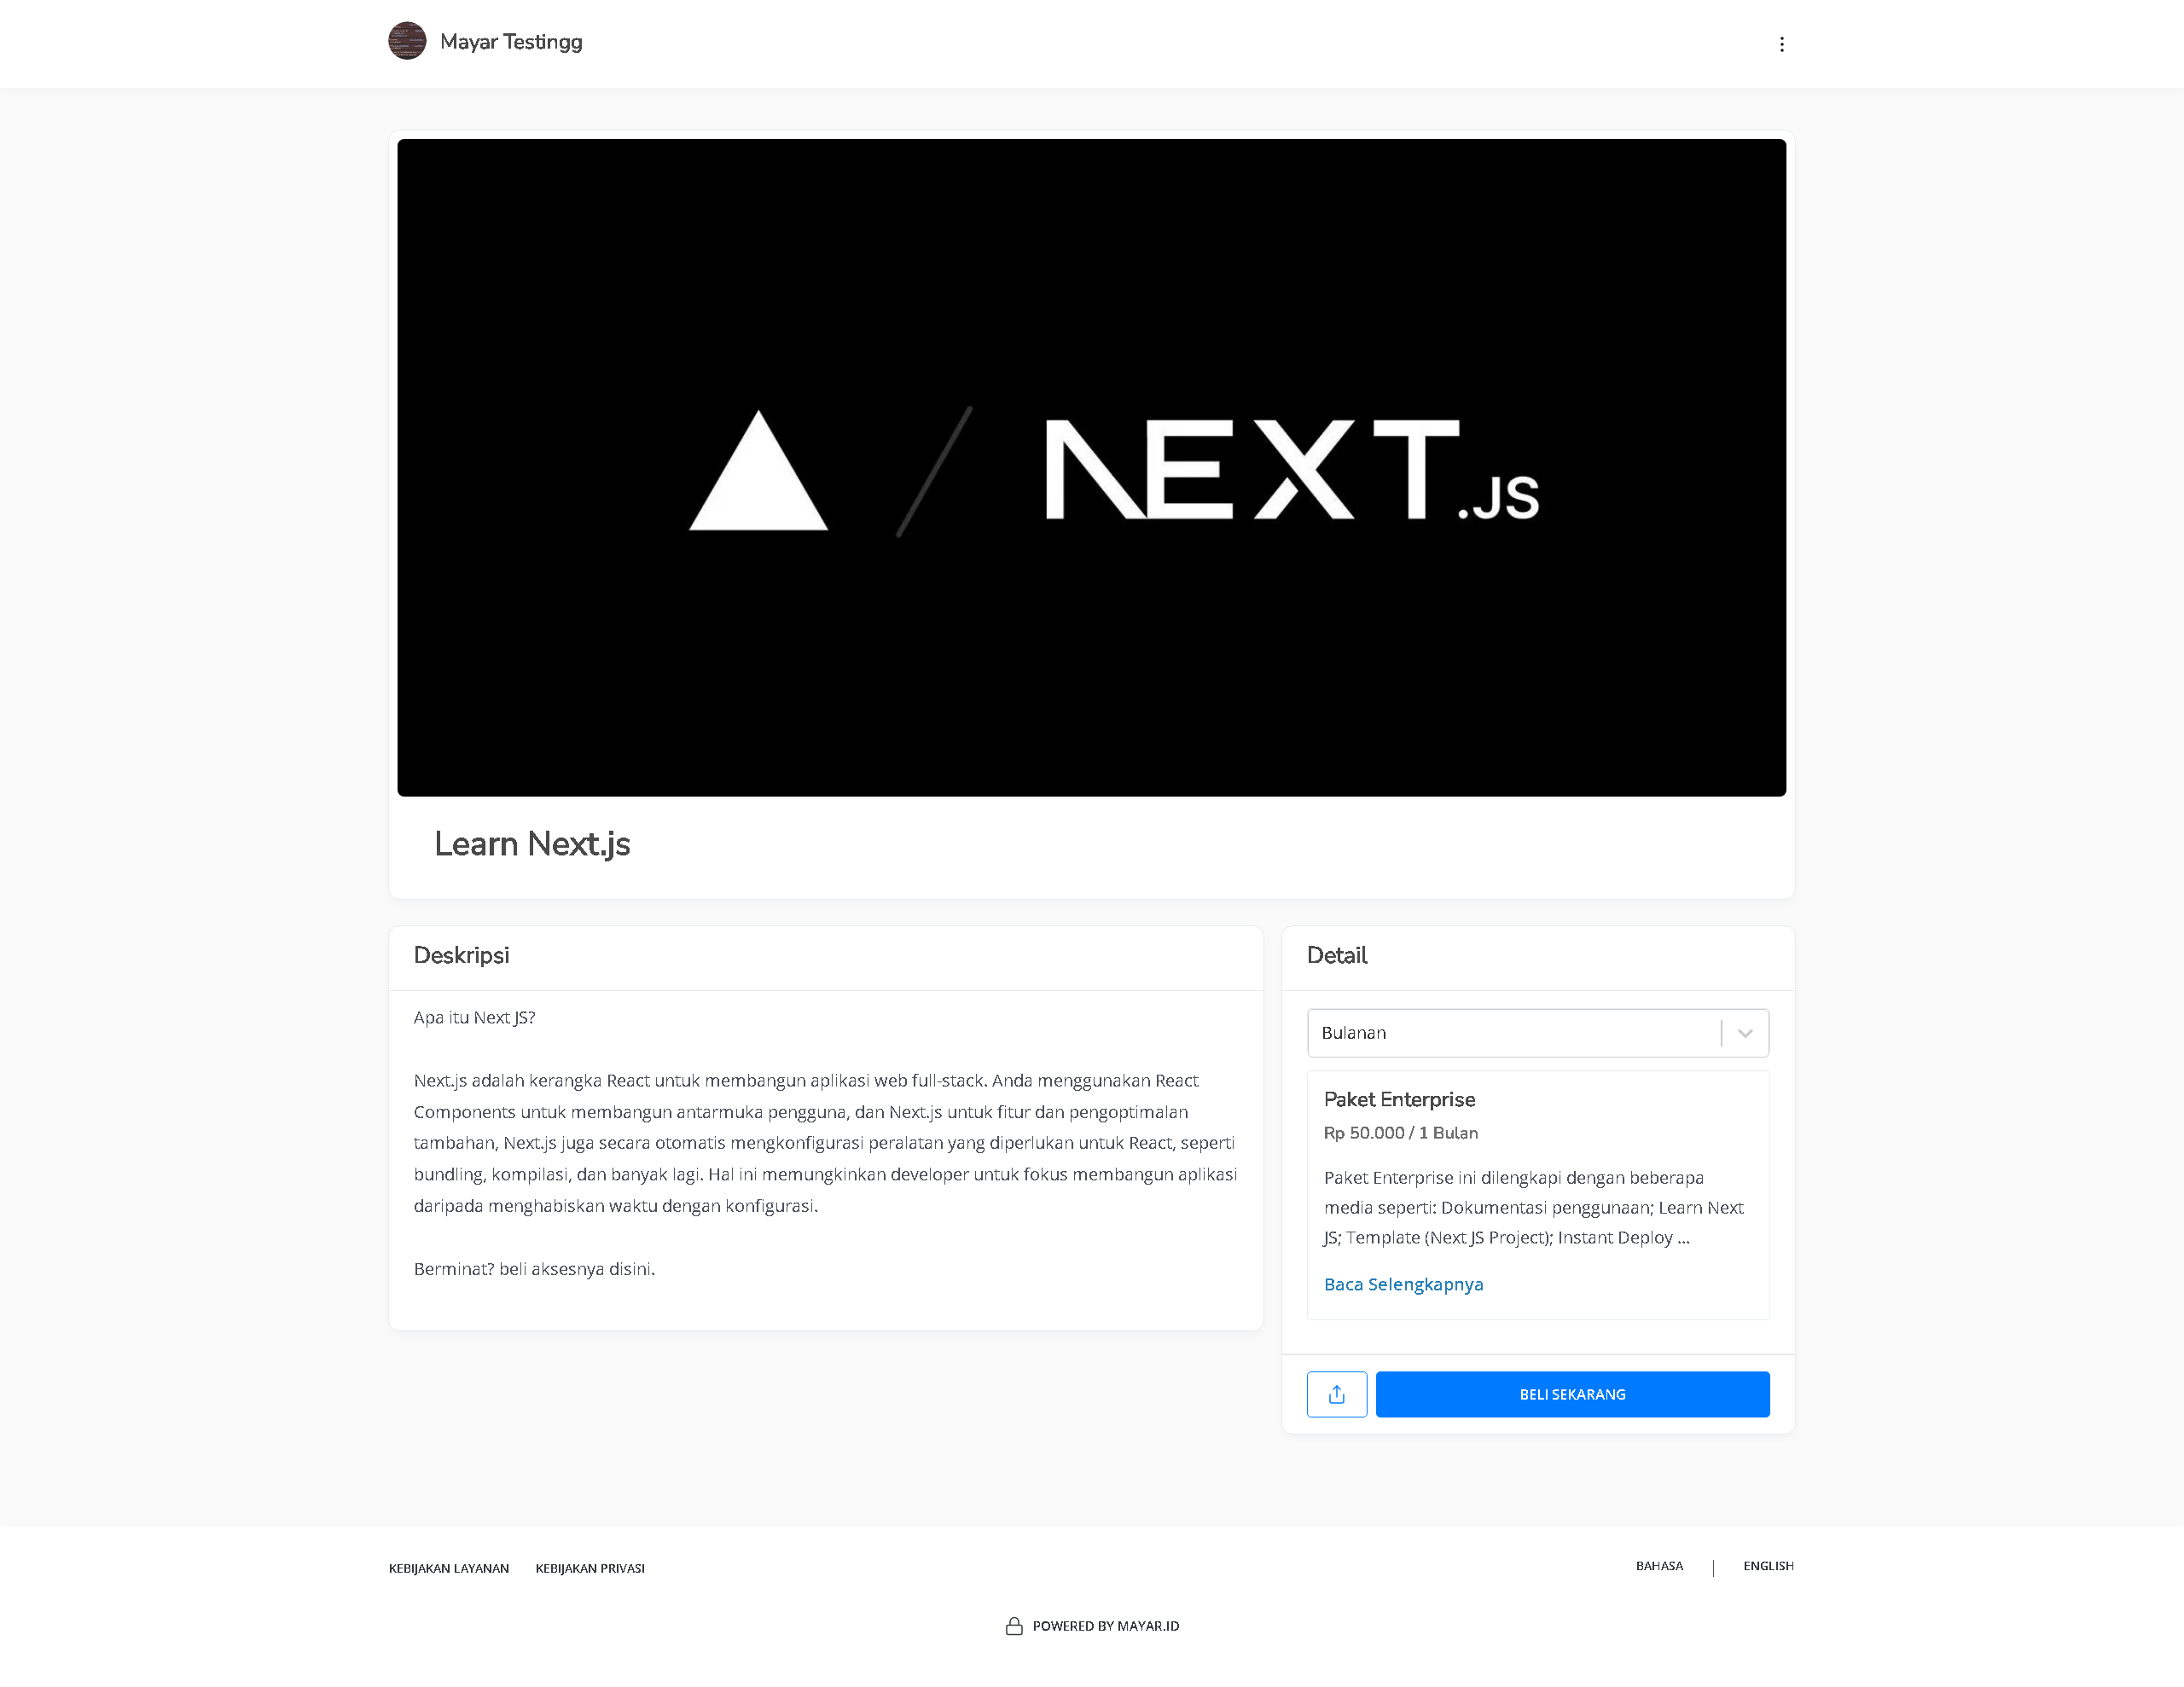
| Name | The SaaS product name, e.g., “Learn Next.js”. |
| Membership Type | Shows the type of service, which is “SaaS (Software as a Service) / Subscription”. This means the service is subscription-based and provided online. |
| Description | Contains a summary or more details about the SaaS service. The “VIEW DESCRIPTION” button indicates that more details are available. |
| Sales Start Time | Shows when the product starts selling. “Unlimited” means there is no restriction on the start time. |
| Number of Active Members | Shows how many users are currently active in this service, e.g., 0. |
| Image/Cover | Visual or cover image of the service, giving a preview to potential users. |
| Show Number of Members on Product Page | Indicates whether the number of users will be shown on the product page. “NO” means it will not be visible to visitors. |
| Downloadable File After Purchase? | Shows whether a file is available to download after purchase. “No” means no file is provided. |
Create SaaS Product Tiers
Click the “Create Tier / Level / Membership Package” button located above the **Membership Tier **table.
Fill in Tier Details
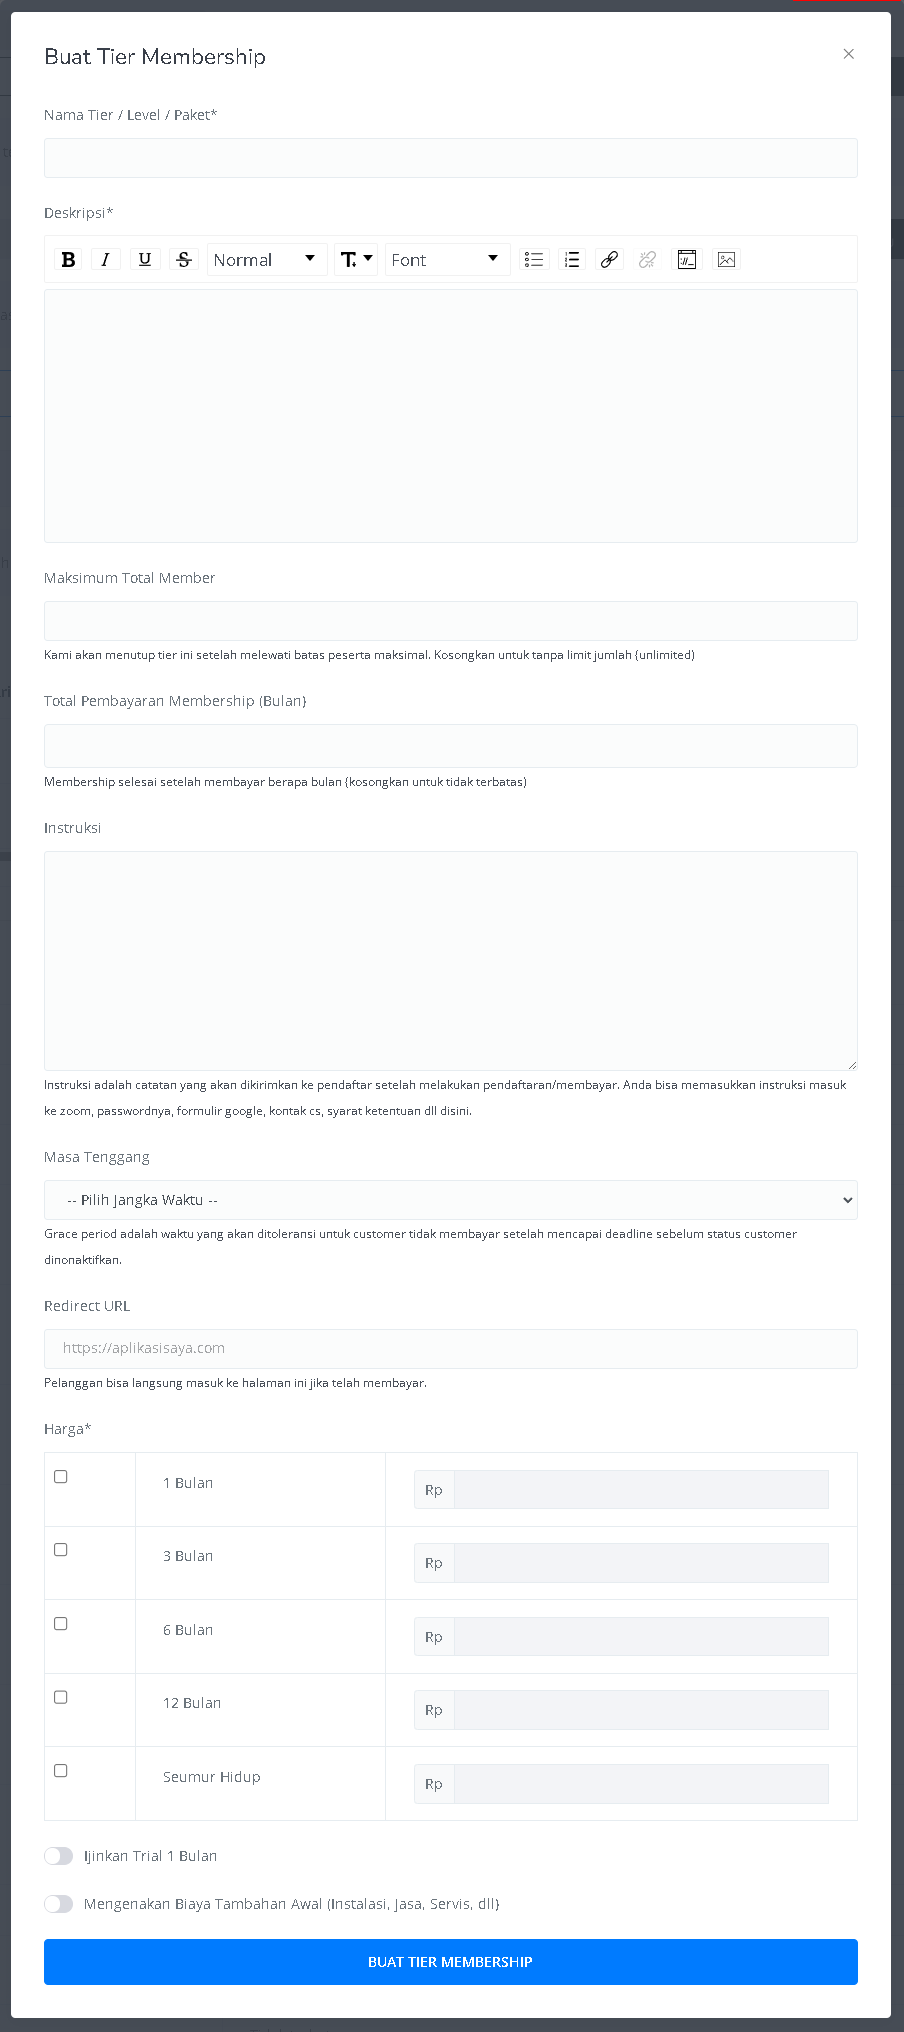
On the “Create Membership Tier” page, enter the following tier information:
| Input Form | Description |
|---|---|
| Tier / Level / Package Name | Field to enter the tier, level, or package name. |
| Description | Text area to add a description of the tier with text editing tools (bold, italic, underline, etc.). |
| Maximum Total Members | Field to set the maximum number of members. Leave blank for unlimited. |
| Membership Payment Duration (Months) | Field to set the billing cycle in months. Leave blank for unlimited. |
| Instructions | Text area to add instructions or notes that will be sent to members after payment. |
| Grace Period | Dropdown to choose the grace period before the account is deactivated if payment is not received. |
| Redirect URL | Field to enter the URL where users will be redirected after a successful payment. |
| Pricing | Table to set the price based on duration (1 month, 3 months, 6 months, 12 months, lifetime). |
| Allow 1-Month Trial | Option to allow a one-month free trial. |
| Charge Initial Extra Fee | Option to add an initial extra fee, such as installation, service, or setup. |
| ”CREATE MEMBERSHIP TIER” Button | Button to submit the form and create the membership tier. |