Overview
Web Comic is a digital platform that allows users to read comics online through their devices, such as computers, tablets, or smartphones. This product offers a wide variety of genres and titles that are easy and quick to access, often with extra features like automatic updates, bookmarking favorite pages, and subscription options for exclusive content. With a user-friendly interface and intuitive navigation, Web Comic provides an interactive and enjoyable reading experience for comic fans, while also helping creators reach a wider audience without geographical limits.How to Create a Web Comic Product
Log in to Dashboard
Make sure you’re logged in to your Mayar account and on the main Dashboard page.
Access Product Menu
Click the “Product” button near the “Create” button in the top right corner. This will take you to the product menu.
Choose Product Type
Select the “Web Comic” option to start creating a Web Comic product. The “Create Web Comic” window will appear.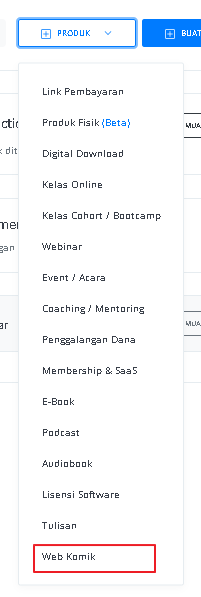
Fill in Product Details
Enter the following information:
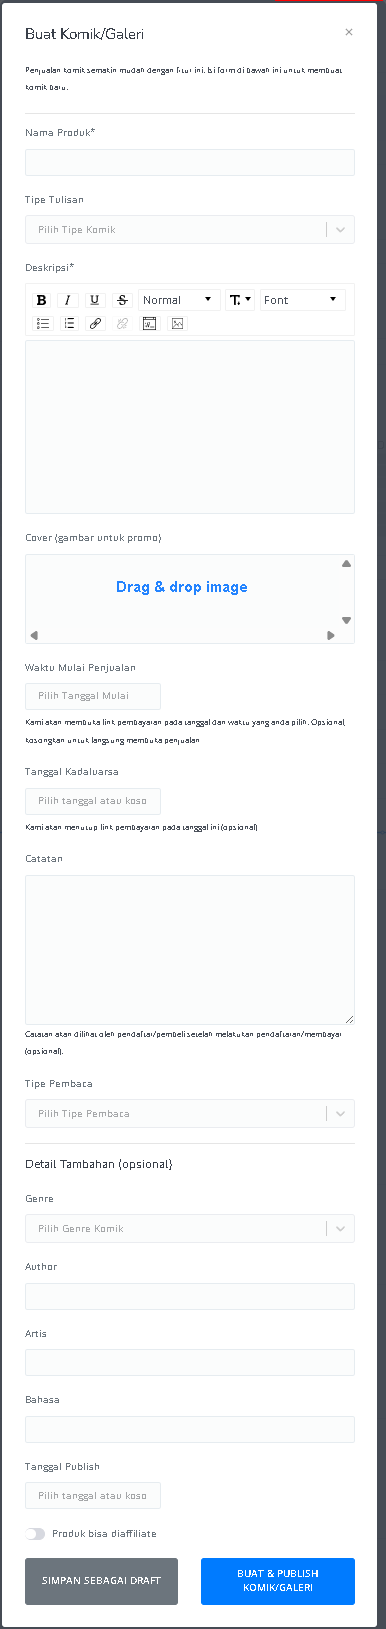
| Input Form | Description |
|---|---|
| Product Name | Field to enter the name of the comic or gallery. |
| Writing Type | Dropdown to choose the type of comic. |
| Description | Text area to add a description of the comic with text editing tools (bold, italic, underline, etc.). |
| Cover (promotional image) | Area to upload the comic’s promotional image (drag & drop). |
| Sales Start Time | Field to select the sales start date and time. Optional, leave blank to start immediately. |
| Expiration Date | Field to set the sales closing date (optional). |
| Notes | Text area to add notes that buyers will see after payment. |
| Reader Type | Dropdown to select the type of readers. |
| Genre | Dropdown to select the comic’s genre. |
| Author | Field to enter the author’s name. |
| Artist | Field to enter the artist’s name. |
| Language | Field to specify the comic’s language. |
| Publish Date | Field to select the publication date (optional). |
| Product Can Be Affiliated | Option to allow the product to be part of the affiliate program. |
| ”SAVE AS DRAFT” Button | Button to save the form as a draft. |
| ”CREATE & PUBLISH COMIC/GALLERY” | Button to submit the form and publish the comic or gallery. |
Create Content
For One-Shot, you can create the Web Comic content directly on the work page. For Chapter type, enter details such as Chapter Title, Cover, and Release Date before adding content per chapter on the work page. Make sure everything matches your chosen payment method and sales strategy.
Review and Finish
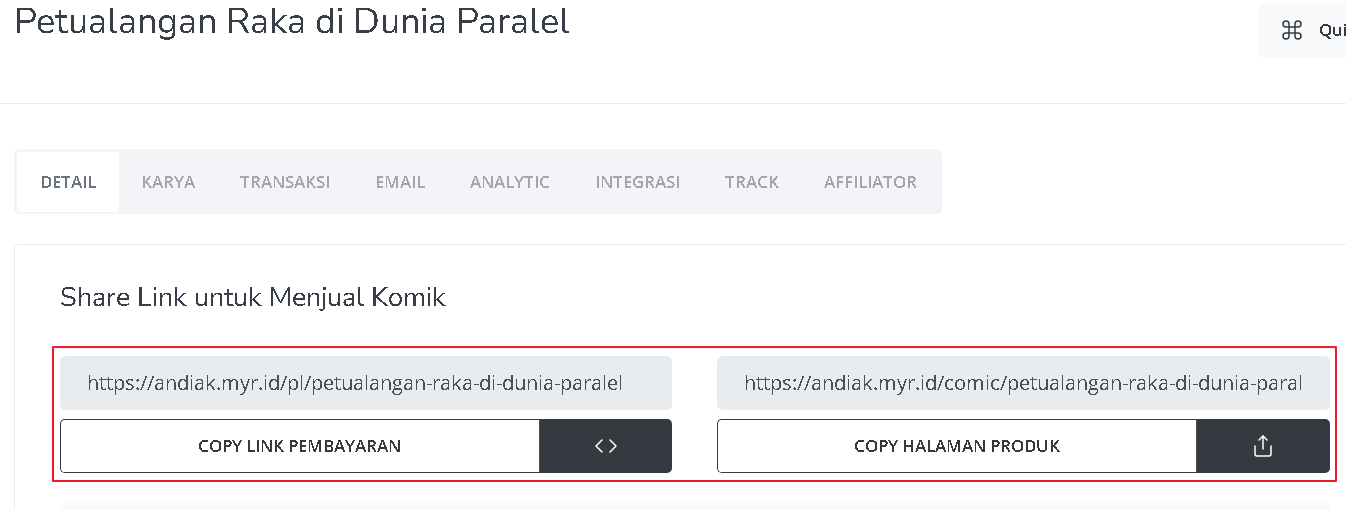
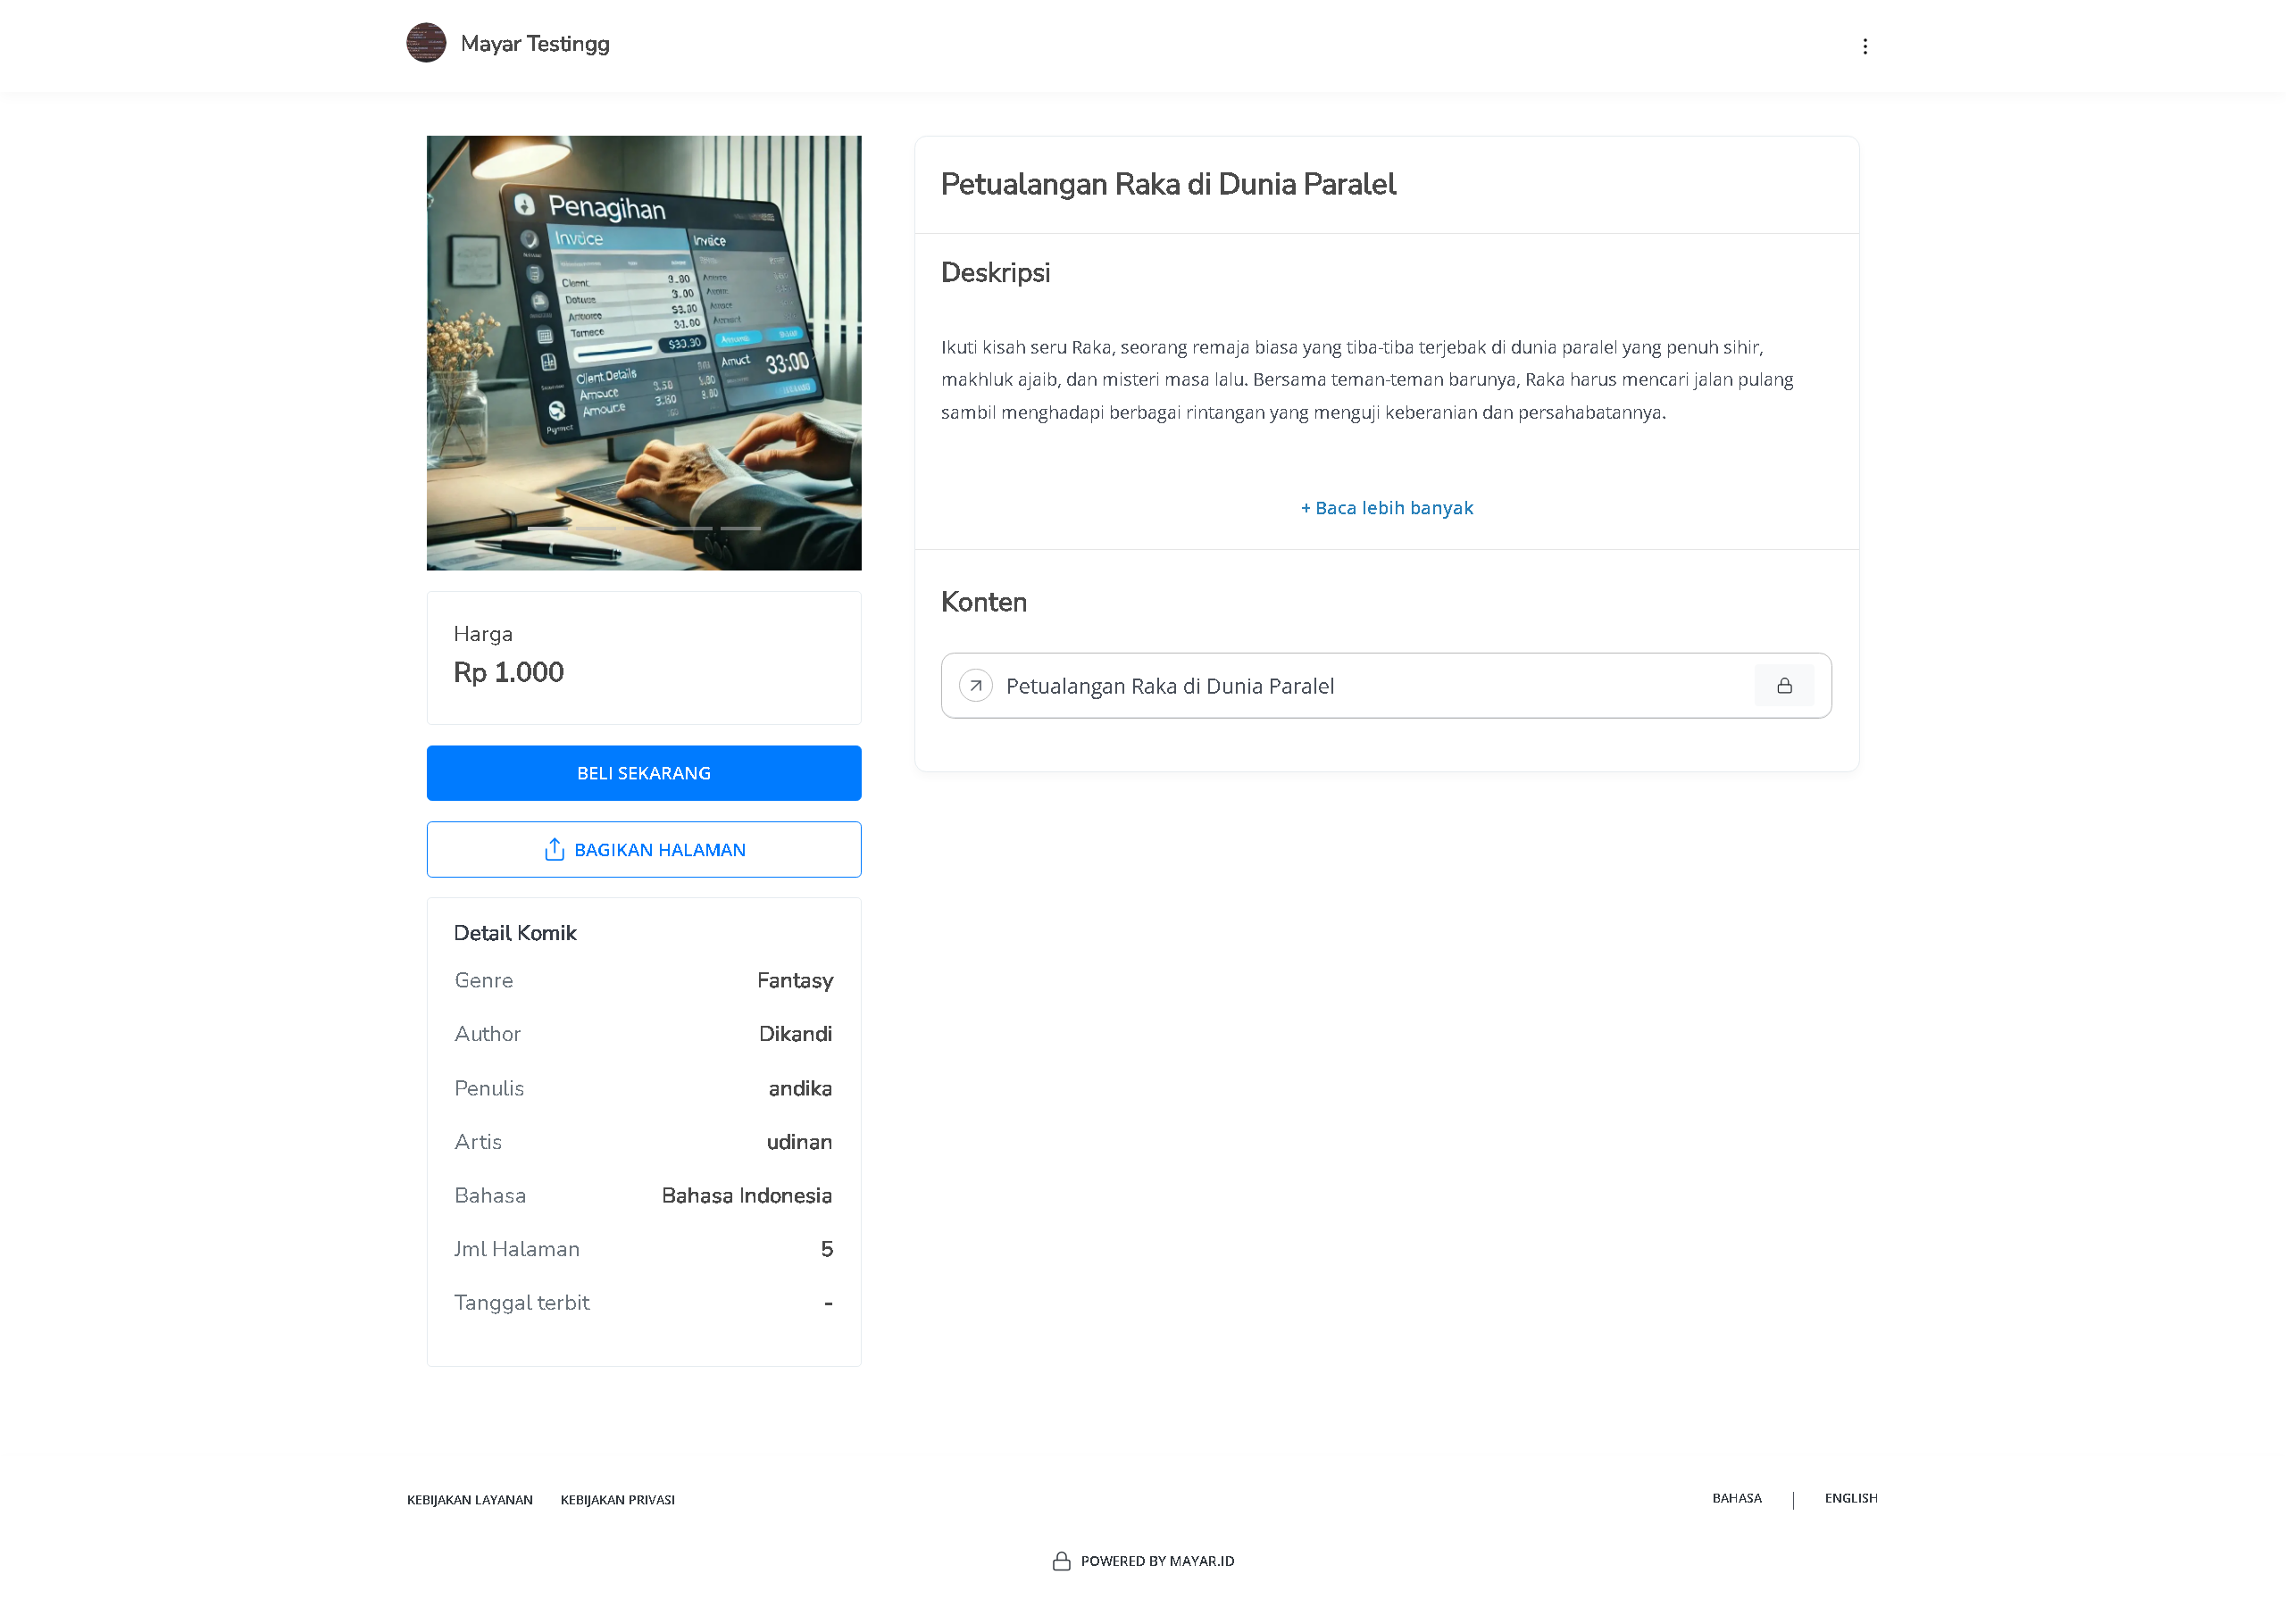
After filling in all the information, double-check the product details to make sure everything is correct. On the Web Comic detail page, you can access the following information:
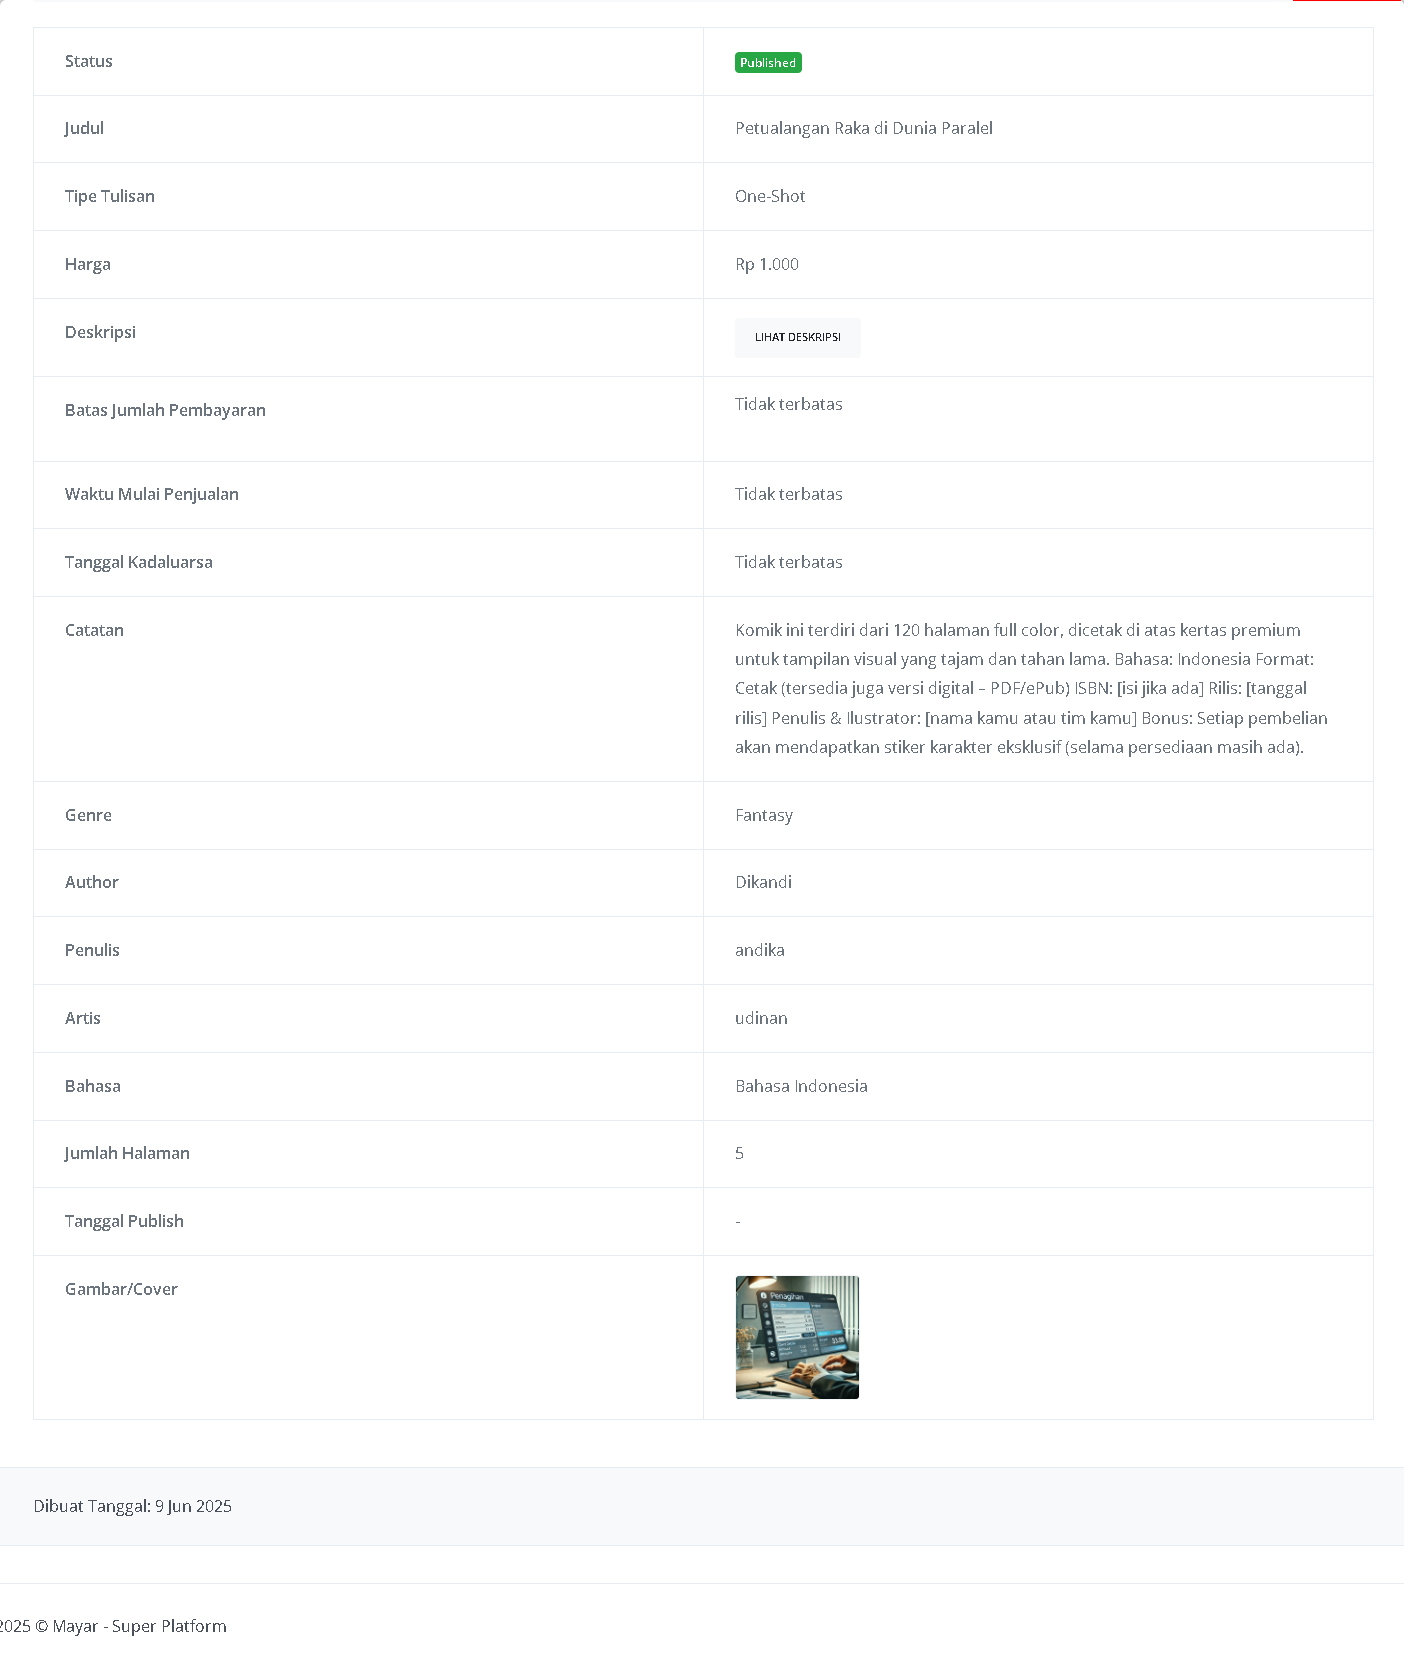
| Information | Description |
|---|---|
| Status | Shows whether the product has been published or not. “Published” means it is available to the public. |
| Title | The name of the comic, e.g., “Petualangan Raka di Dunia Paralel”. |
| Writing Type | Shows the type of work, in this case “One-Shot”, meaning the comic is complete in one edition. |
| Price | The cost to purchase the comic e.g., Rp 1,000. |
| Description | Contains a summary or more details about the comic. The “VIEW DESCRIPTION” button indicates there’s more to read. |
| Payment Limit | States whether there is a limit to the number of payments. “Unlimited” means no limit. |
| Sales Start Time | Shows when the product starts selling. “Unlimited” means no restriction. |
| Expiration Date | Shows how long the product has been available. “Unlimited” means no expiration date. |
| Notes | Additional information about the product, such as format, language, or bonuses for buyers. |
| Genre | The comic’s category or theme, e.g., “Fantasy”. |
| Author | The main creator of the comic, e.g., “Dikandi”. |
| Writer | The person who wrote the story, e.g., “Andika”. |
| Artist | The illustrator or person who drew the comic, e.g., “Udinan”. |
| Language | The language used in the comic, e.g., “Indonesian”. |
| Number of Pages | The total number of pages in the comic, e.g., 5 pages. |
| Publish Date | The date the comic was published. In this example, the date is not set (”-”). |
| Image/Cover | The visual or cover of the comic gives buyers a preview. |
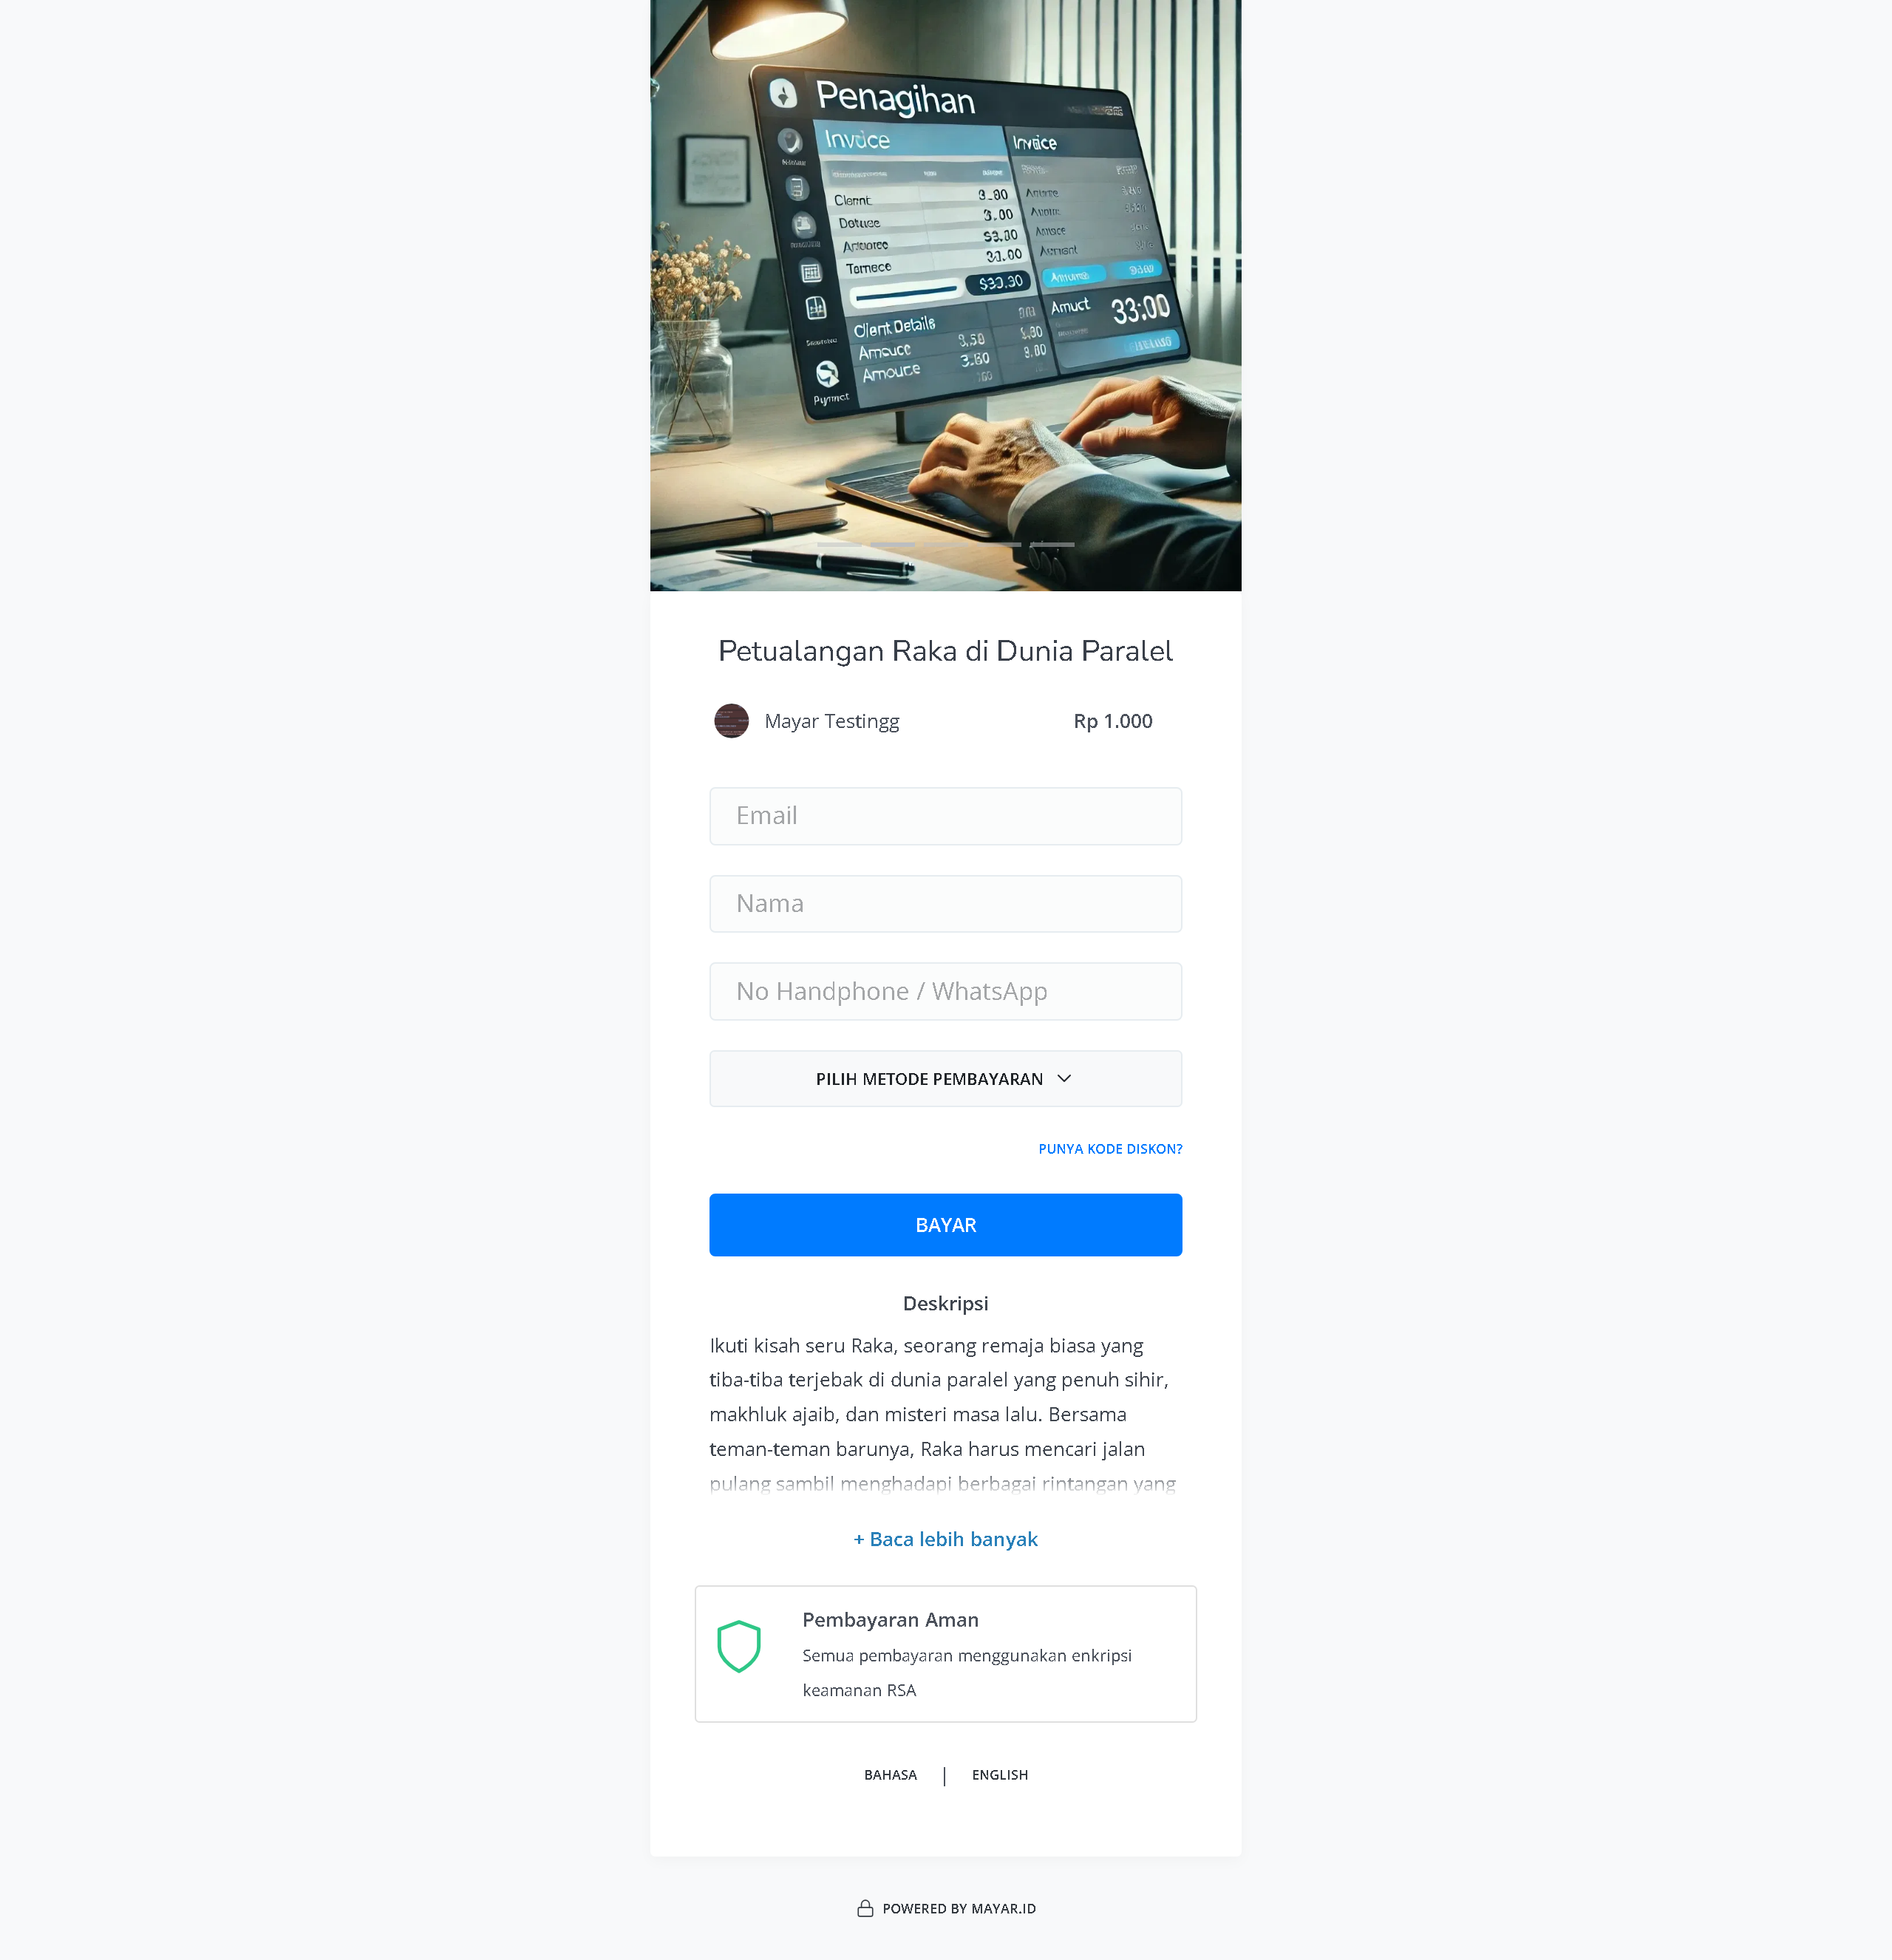
How to Access the Product Page and Checkout
Access Product Page
You can access the product page through the link provided in the product details.