Overview
The Membership product on Mayar offers a variety of exclusive perks for members, including priority access to the latest features, special discounts on selected services, and more responsive customer support. By subscribing to a Membership, users can enjoy a more personalized and integrated experience, making the most out of Mayar’s services. In addition, members also get the opportunity to join exclusive events and promotions that are not available to non-members. This membership is designed to enhance convenience and efficiency in managing everyday financial needs.How to Create a Membership Product
Click “Product"
Find and click the “Product” button at the top right corner, next to the “Create” button.
Select “Membership & SaaS”
When the creation menu appears, choose “Membership & SaaS.” A new window titled “Create Membership” will open.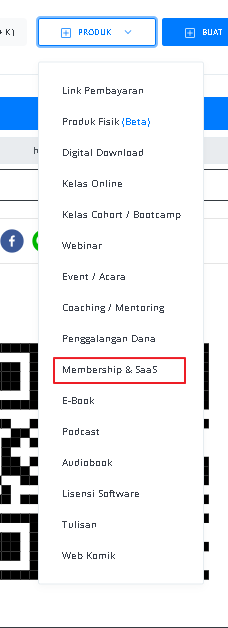
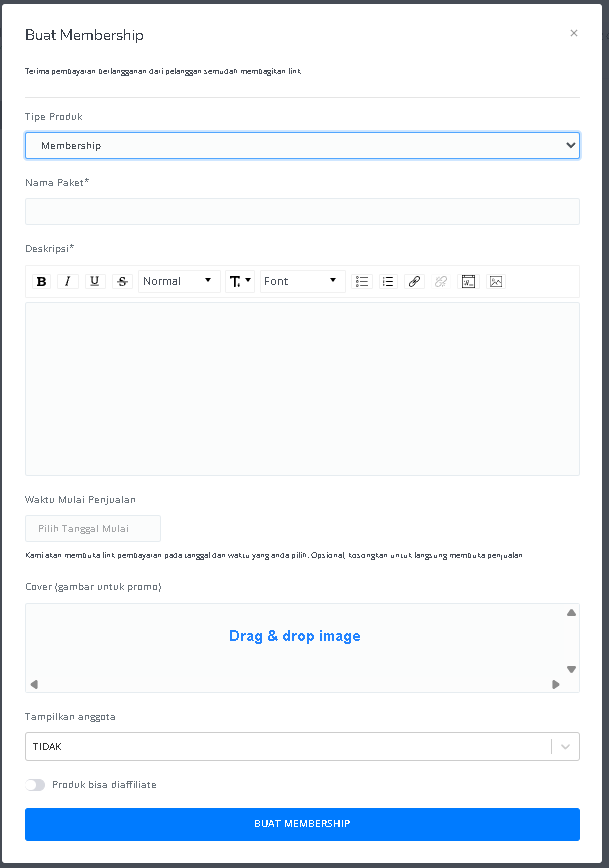
Fill in Membership Product Details
Enter the following information:
| Input Form | Description |
|---|---|
| Product Type | A dropdown that shows the product type, which is “Membership”. |
| Package Name | Field to enter the membership package name. |
| Description | Text area to add a package description with text editing tools (bold, italic, underline, etc.). |
| Sales Start Time | Field to set the start date and time for sales. Optional, leave blank to start immediately. |
| Cover (promotional image) | Area to upload the membership promotional image (drag & drop). |
| Show Members | A dropdown to choose whether or not to display members. |
| Product Can Be Affiliated | Option to allow the product to be part of the affiliate program. |
| ”CREATE MEMBERSHIP” Button | Button to submit the form and create the membership product. |
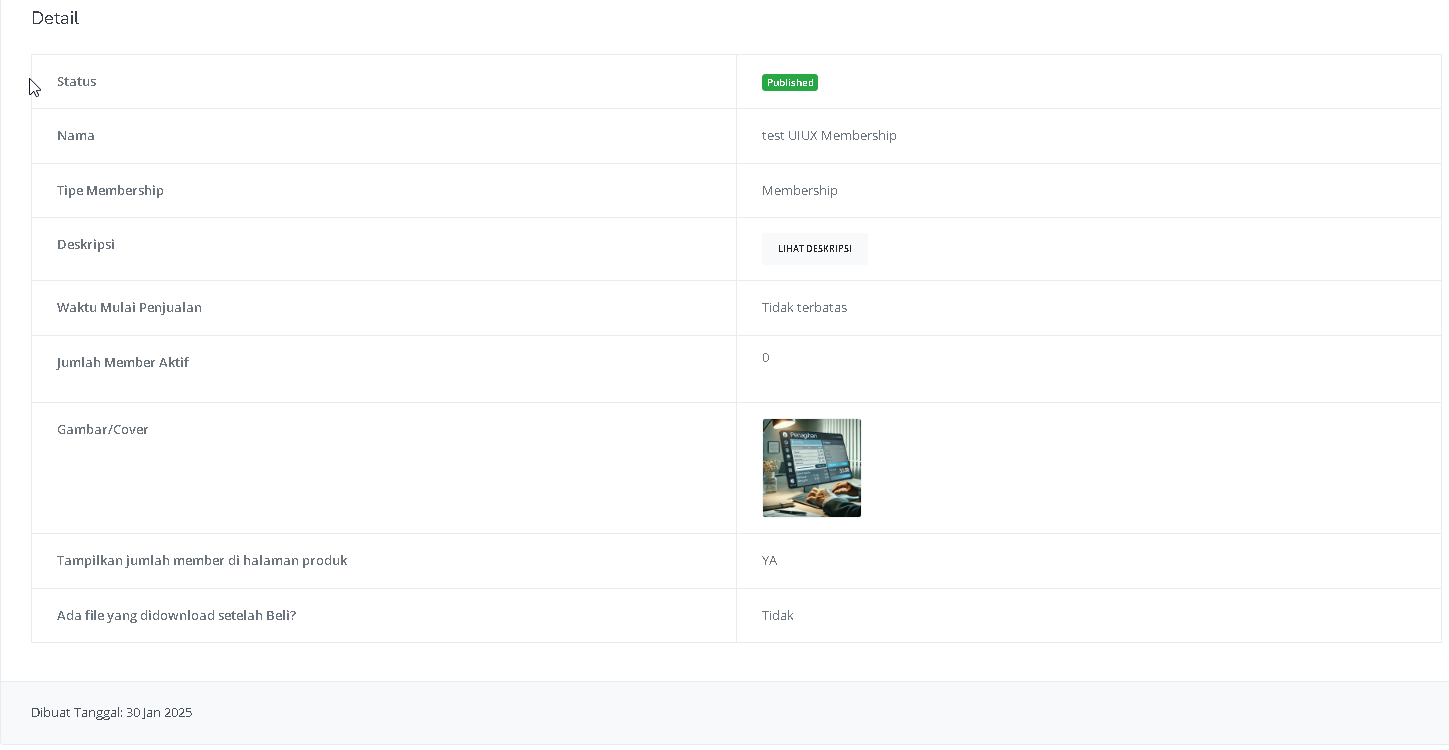
Access Membership Product Detail Page
After filling in the information, you will be redirected to the Membership Product Detail page. Here, you can see the following information:
| Information | Description |
|---|---|
| Status | Shows whether the product has been published or not. “Published” means it is available to the public. |
| Name | The membership name, e.g., “test UIUX Membership”. |
| Membership Type | Shows the type of membership; here, it is simply “Membership”. |
| Description | Contains a summary or more details about the membership. The “VIEW DESCRIPTION” button indicates that more details can be read. |
| Sales Start Time | Shows when the product starts selling. “Unlimited” means there is no start time restriction. |
| Number of Active Members | Shows how many members are currently active in this membership, e.g., 0. |
| Image/Cover | Visual or cover image of the membership, giving a preview to potential members. |
| Show Number of Members on Product Page | Indicates whether the number of members will be shown on the product page. “YES” means visitors can see it. |
| Downloadable File After Purchase? | Shows whether a file is available to download after purchase. “No” means no file is provided. |
Create Membership Tier
Click the “Create Tier / Level / Membership Package” button above the Membership Tier table.
Fill in Membership Tier Details
Enter the following information for the membership tier:
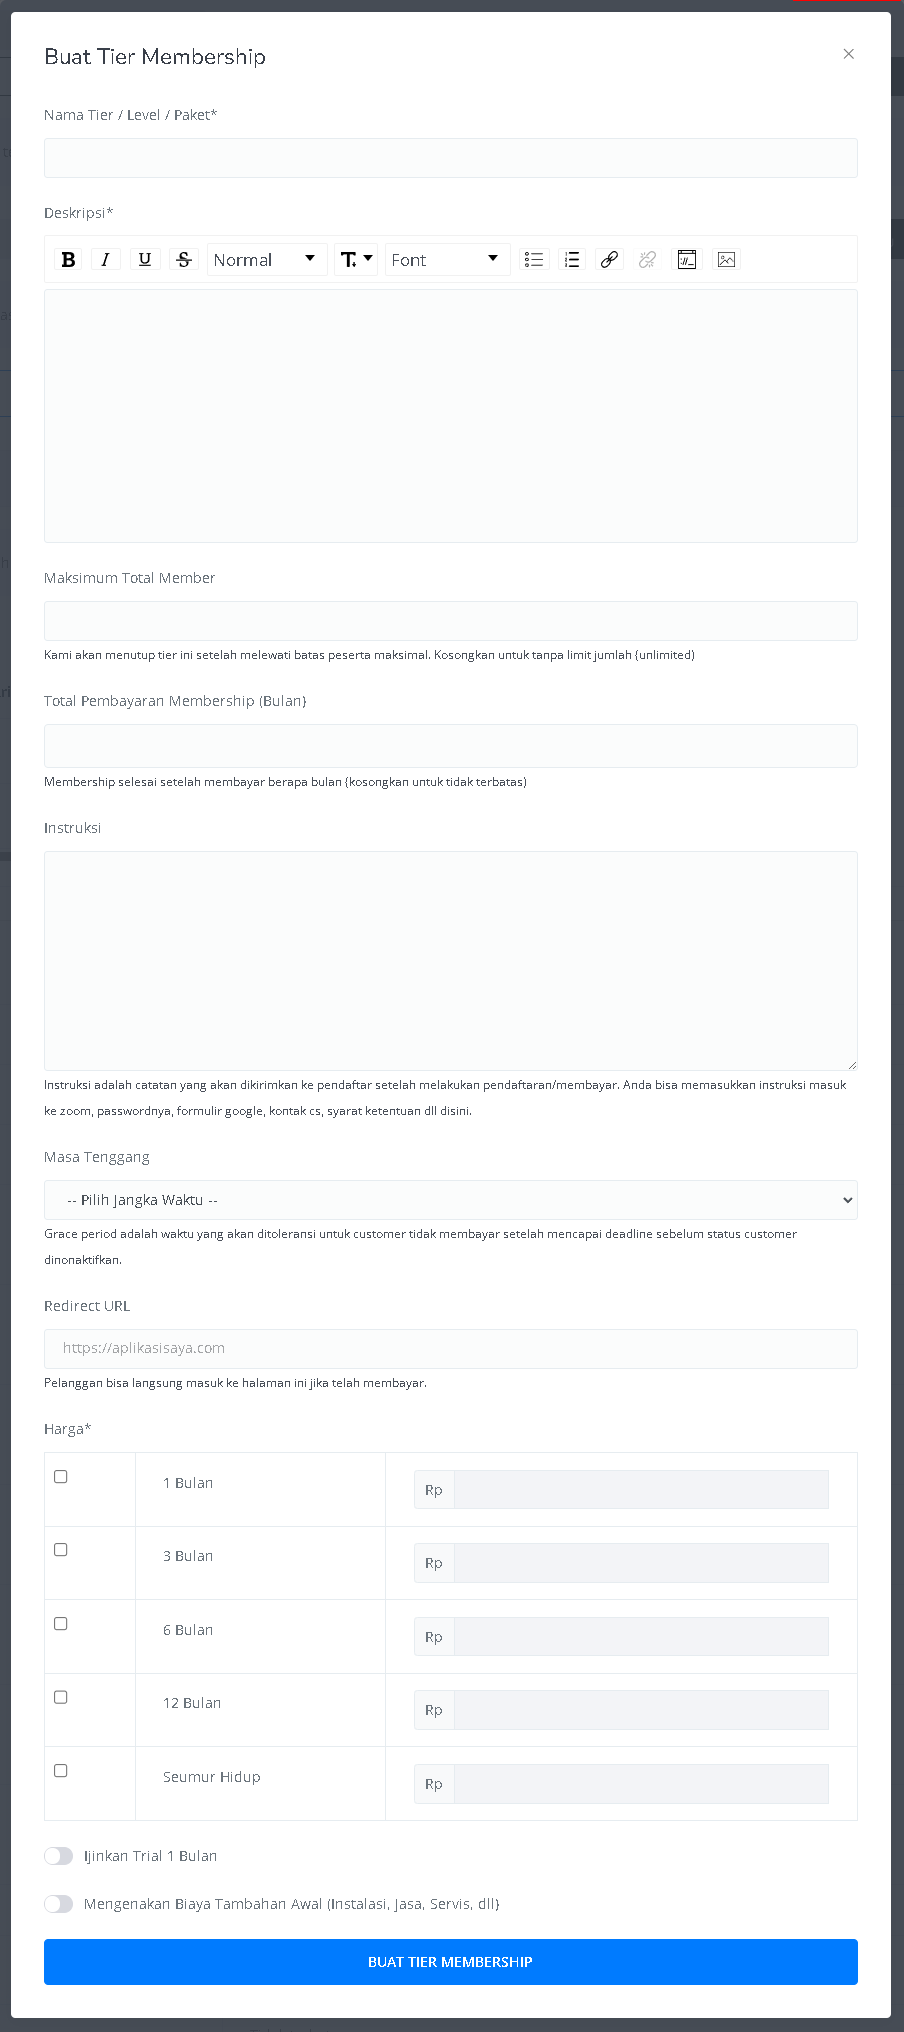
| Input Form | Description |
|---|---|
| Tier / Level / Package Name | Field to enter the tier, level, or package name. |
| Description | Text area to add a tier description with text editing tools (bold, italic, underline, etc.). |
| Maximum Total Members | Field to set the maximum number of members. Leave blank for unlimited. |
| Membership Payment Duration (Months) | Field to set the membership billing duration in months. Leave blank for unlimited. |
| Instructions | Text area to add instructions or notes that will be sent to members after payment. |
| Grace Period | Dropdown to choose the grace period before the account is deactivated if payment is not received. |
| Redirect URL | Field to enter the URL members will be redirected to after a successful payment. |
| Pricing | Table to set the price based on duration (1 month, 3 months, 6 months, 12 months, lifetime). |
| Allow 1-Month Trial | Option to enable a one-month trial period. |
| Charge Initial Extra Fee | Option to add an extra upfront fee, such as installation, service, or setup. |
| ”CREATE MEMBERSHIP TIER” Button | Button to submit the form and create the membership tier. |
Access Membership Content Page
After creating a Tier, you can access the content page under the Membership name.
Create Membership Content
Click the “Create Membership Content” button to open the “Create Content Section” page.
Fill in Content Configuration
Add a Title, Description, Cover Image, and set access rights for each Membership Tier.
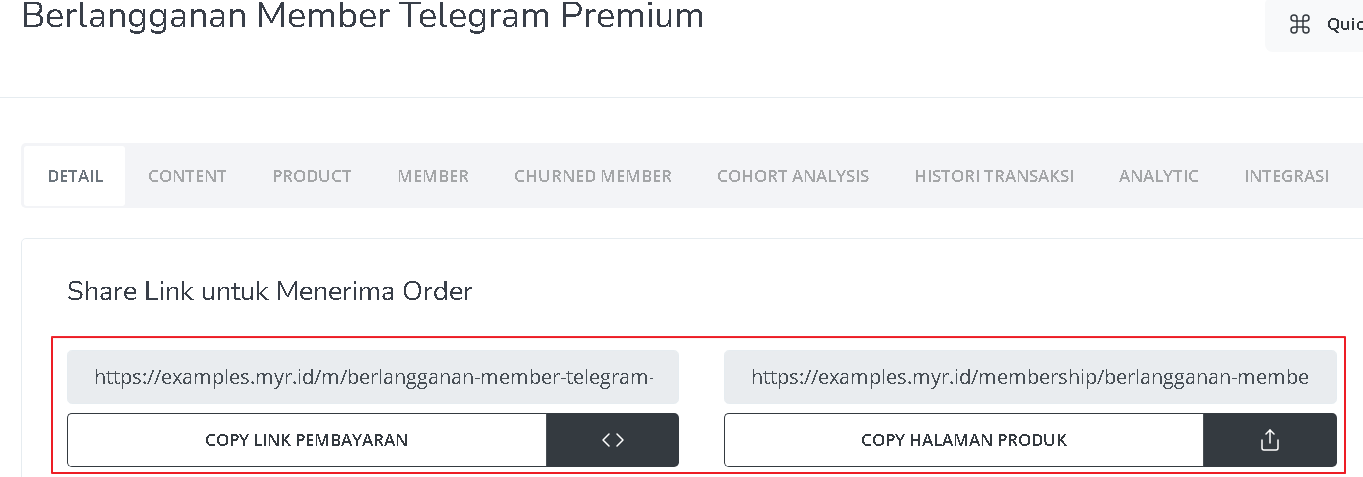
Access Product Page
Once the content modules are created, access the Product page under the Membership name.
Add Products to Membership Tier
Click “Add Product Access” to include products such as digital items, online classes, e-books, podcasts, and more.